How to Build a Coffered Ceiling With (Relative) Ease

How to Build a Coffered Ceiling
Looking to add some architectural class to your home on a shoestring budget? Consider the simple, yet elegant design of a coffered ceiling. With a couple of beams, a few careful measurements and a boatload of power tools, you can turn a drab room into a palatial parlor. We’ll show you exactly how to install your very own coffered ceiling the cheap and easy way.

Wait, What’s a Coffered Ceiling?
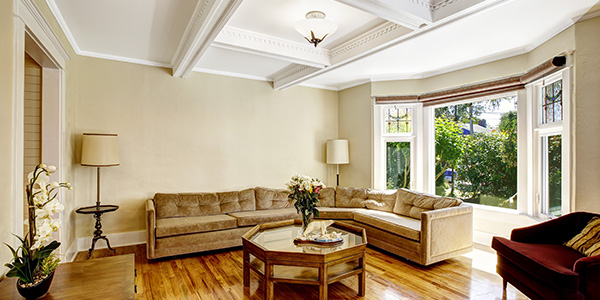
A coffered ceiling features a series of sunken panels in the shape of a square, rectangle or octagon. You’ve probably seen a few examples in local museums, libraries or in a humble little city-state known as the Vatican.
Pretty impressive, isn’t it? While your own DIY coffered ceiling won’t be made of stone or bear the handiwork of famous Italian Renaissance artists, it will look a whole lot fancier than your current living room ceiling:
What You Will Need to Install a Coffered Ceiling:
Before you start, make a quick trip to your local hardware store and pick up the following items (prices based on MSRP of common brands):
- Miter Saw ($100-$200)
- Tape Measure ($10)
- Power Drill ($25-$100)
- Nail Gun ($40-$200)
- 2-by-4-Inch Lumber ($3-$4 per 8 feet)
- ¼-Inch Oak ($12-$120, varies by cut and quality.)
- Crown Molding ($5-$10)
- Stain ($5-$12)
- Paintbrushes ($2)
- Board Adhesive ($5)
- Wood Glue ($3)
- Chalk Line ($5-$15)
- A Free Weekend (This might be out of stock.)
Maximum Cost (Excluding Wood): ~$547
As you can probably tell from the list, this project requires a few basic mechanical and math skills to ensure the end result is picture-perfect. If you’ve never attempted something like this before, try starting with this tutorial on crown molding installation to build up your skillset.
How to Make a Coffered Ceiling
In the example below, we’ll build the main grid using two-by-fours. We’ll then fasten oak boards to each one for a nice finish. You can use any type of wood for this, or you can forgo the cladding altogether and install one-by-six-inch beams for a simple, flat appearance. The first six steps are the same for the majority of coffered ceiling designs you may opt for.
Step #1: Stain the Oak
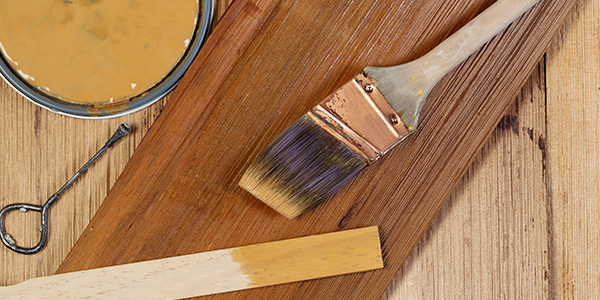
Stain the oak wood and molding. Apply the stain using a paintbrush and then wipe away the excess with a clean cloth to expose the wood grain.
Step #2: Lay Out the Grid
Put your design on paper before marking up your ceiling. This will help you keep track of the dimensions of each beam. The main beams should run parallel to the ceiling joists so they are well-supported once installed.
Step #3: Find Your Ceiling Joists
Identify your joists using either a stud finder or tapping the ceiling every 16 inches from where the wall meets the ceiling. When you hear a solid sound, you’ll know you’ve found a joist. Record where each joist is on your layout and mark them as the location of your main beams.
Step #4: Chalk the Grid Lines on Your Ceiling
Use a chalk line to draw the grid on your ceiling. For the novice DIYer, a chalk line is a spool of string dipped in chalk or a light dye that leaves a straight line when plucked against a flat surface. They are very useful when working on walls and ceilings, or any other project that requires long reference lines.
Step #5: Measure the Grid and Cut Wood to Size
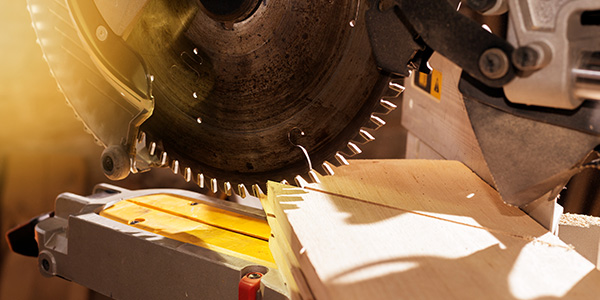
Measure the length and width of the grid and cut your two-by-fours accordingly using a miter saw.
Step #6: Fasten the Main Beams to Your Ceiling
Apply adhesive to the back of each main beam and place them along the appropriate reference lines. Use pressure to ensure the boards stick to the ceiling, then shoot a nail through the corner of each board.

Pro Tip
"If you’re building your coffered ceiling solo, you’ll need a deadman in place of an assistant. A deadman is simply a “T”-shaped support to hold up one end of the beam while you fasten the other end. To build one, take a short piece of scrap lumber and drill it into one end of a longer piece of scrap. The assembled deadman should be ¾-inch shorter than the height of your ceiling."
Step #7: Install the Crossbeams
Set each crossbeam on the appropriate reference line and shoot a nail through each corner. Then, holding your nail gun at a 45-degree angle to the joint, shoot a nail through the corner of the crossbeam into the main beam. Repeat for each corner of the crossbeam.
Step #8: Cut the Oak Boards to Size and Fasten
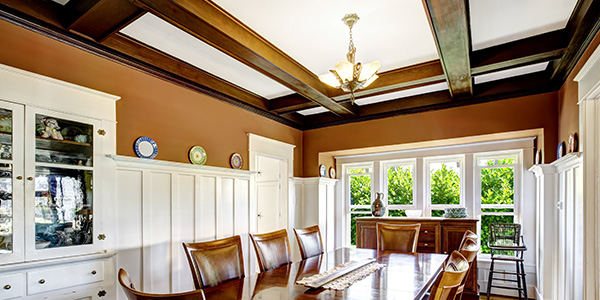
Measure the length of oak needed to cover each two-by-four. In most coffered ceiling designs, the vertical pieces sit slightly lower than the two-by-fours, as in the example above. Use your nail gun to fasten each piece of oak to the two-by-fours.
Step #9: Cut and Fasten Interior Molding
You’re almost there. Now, you must measure the length of molding needed for the interior of each box. The molding will cover the joint where the oak boards meet the ceiling. Use wood glue to fasten each piece of molding.

