How to Build and Plant a Raised Garden Bed

How to Build a Raised Garden Bed
Looking for a way to grow more flowers or vegetables in your small yard? Consider building a raised garden bed to give yourself plenty of space to grow healthy, hearty plants.
Keep reading to learn the benefits of a raised garden bed, as well as a step-by-step guide to build and plant a bed.
What Is a Raised Garden Bed?
A raised garden bed is a raised box used as a garden plot for growing plants. A raised garden bed is filled with quality soil and placed where there is plenty of sunlight.
The Benefits of a Raised Garden Bed:
- Easier weeding with less bending and kneeling for the gardener.
- Better drainage for your plants.
- Fewer weeds than a typical garden.
- Higher ground temperature for a longer growing season.
- More fertile soil than a typical garden.
- Minimal space requirements.

“Being able to choose the soil that you plant into is perhaps the most important benefit that raised beds provide. Choosing a soil that is fertile, weed free and well drained provides the very foundation for a successful garden. Because the soil in raised beds is elevated above the surrounding soil, it tends to warm up more quickly in the spring allowing for earlier germination of seeds, more rapid vegetative growth, and earlier harvest of vegetables. Raised beds also offer the opportunity to install a protective screen at ground level to prevent rodents like moles and gophers from tunneling up into your garden.”
Ian Wilson, Portland Edible Gardens
A raised garden bed should be a maximum of 4 feet wide so you can easily weed the center of the bed without stepping into it. For depth, the bed should be at least 6 inches deep, but the deeper the better. Raised garden bed expert Ian Wilson advises 24 inches in depth for a comfortable working height and healthy plant roots.
This simple guide will help you build a 4-foot by 8-foot bed that is 12 inches deep.
Materials for DIY Raised Garden Bed
- Two 2 inch by 12 inch by 8 foot long boards
- Two 2 inch by 12 inch by 4 foot long boards
- Electric drill
- 12 4-inch decking screws
- Tape measure
- Speed square
- Pencil
- Newspaper, cardboard or compostable fabric
- Hoe
- Shovel
- Rake
- 1 1/5 cubic yards of dirt and compost mix*
- Plants of your choice
Optional materials: Staple gun, plastic sheeting and mulch
*If you’re making a bed of a different size, the amount of dirt you will need will vary.
Tips for Choosing Wood for Your DIY Raised Garden Bed:
- Pressure treated wood is less expensive and will last longer, but will put your garden in contact with chemicals. Choose carefully.
- Cedar is a weather-resistant wood that will last longer but is also more expensive.
- If you choose a less expensive and untreated wood, make it last longer by using some of the optional materials listed above to line the inside of the bed with plastic sheeting to protect the wood from the damp soil.
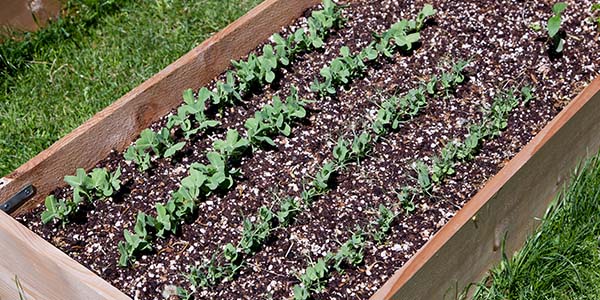
How to Build a Raised Garden Bed
Step 1: Prepare the Ground for Your Garden Bed
Choose the location for your bed based on the light and shade needs of the plants that will be in your garden. If you haven’t chosen plants yet, choose a spot that gets at least six hours of sunlight every day.
While you can place your bed on concrete, a dirt or grass location will give your plants more space to grow their roots and provide better drainage. Choose a relatively level area and measure the space to ensure your bed will fit. If you’re following this guide, the space should be 4 feet by 8 feet.
Using your hoe or shovel, remove the grass in this area and loosen the dirt while leveling the ground. You want the sides of the bed to sit flush on the ground so vermin and weeds won’t fit under the edges.
Need a simple, affordable way to get rid of soil? Follow our helpful dirt disposal guide!
Step 2: Frame Your Garden Bed and Set Screws
Lay out your wood with the longer pieces parallel to each other and the shorter pieces perpendicular to each end of the longer boards.
On the broad side of the 4-foot boards, measure 1 inch in from the end and 3 inches down from the top. Mark this spot for a screw. Measure 3 inches down from that spot and mark a second spot. Repeat one more time. Complete this process at both ends of the two 4-foot boards.
Using the electric drill, sink the screws one-third of the way into the marked spots or until the screws stand on their own.
Step 3: Build the Bed
Next, use the screws to attach the 4-foot end pieces to the 8-foot side pieces. With the help of a second person, hold one 8-foot side piece on its side, making the outside edge flush with the end of the 4-foot board so they overlap. Use a speed square to make sure the boards meet at a 90-degree angle.
Finish sinking the screws to attach the two boards.
Repeat this process at the other three corners of the bed until both sides are attached.
To extend the life of your wood, use a staple gun and heavy-duty plastic sheeting to line the sides of your bed. This will make them more rot resistant. Cut the plastic sheeting into 12-inch-wide strips and cover the inside walls of the bed using staples at the top and bottom of the sheeting every few inches.
Step 4: Place and Fill Your DIY Raised Garden Bed
Move your completed bed to the prepared area. If there are any gaps between the ground and the bed, fill them with dirt.
Using your newspaper, cardboard or other compostable fabric, line the bottom of the bed to further reduce weed growth.
Fill your bed with the dirt and compost mixture until the dirt is half an inch from the top. Fill it slightly less if you plan to add mulch once you’re finished planting. Level the dirt with your rake.
Now you’re ready to fill your DIY garden bed with plants.
Want to create your own compost? Learn tips for creating a sustainable composting solution at home!

What to Plant in a Raised Garden Bed
You can treat your new raised garden bed like a regular garden and plant anything that will survive in your climate, from flowers to gourds. It’s a good idea to choose plants that will thrive with the loose soil and quick drainage a raised bed provides. Companion plants also do well in raised beds because of the close quarters.
Some of the best vegetables to grow in raised beds include:
- Root vegetables, like carrots and beets.
- Leafy greens, including lettuce and kale.
- Tomatoes.
- Onions.

“If you are growing vegetables in your raised beds, choose vegetables that are high yielding for the space they take up, like salad greens, root vegetables, or productive summer vegetables like tomatoes, peppers, and eggplants.”
Ian Wilson, Portland Edible Gardens
How to Plant in a Raised Garden Bed
Once you’ve chosen plants for your raised garden bed, choose a layout that will make weeding simple, allowing you to take advantage of the entire space and help your plants thrive.
Tips for Your Raised Bed Garden Layout:
- Plant tallest to shortest, starting at the north end of the bed and working south.
- If you are growing vine plants like cucumbers or peas, build a trellis on the north side of the bed to prevent them from crowding or shading the other plants.
- Place plants slightly closer together than you would in a typical bed.
- Plant herbs around the edges or in corners to save space.
Now that you know where each plant should be in the bed, you’re ready to insert your seeds and seedlings. Dig holes based on the needs of each plant, remembering to bring them slightly closer together than is typical.
