The Best Beadboard Installation Projects for the Kitchen, Bathroom and Bedroom

Project Overview
6 Ideas for Installing Beadboard in Your Home
Adding a bit of style to your home doesn’t have to come with a massive price tag. That’s why frugal do-it-yourselfers learn how to install beadboard, an inexpensive wood paneling that offers an easy way to add decorative accents to any room in the house. But before you hit Home Depot, familiarize yourself with the different types of beadboard and the tools you’ll most likely need.
Know the Different Types of Beadboard
Real Wood Beadboard
- Look: High-quality, wooden appearance.
- Best for: Main rooms, hallways and other up-close applications.
- Cost: More than $1 per square foot. Pine is less expensive, and cherry is one of the most expensive at $22 per square foot.
Medium-Density Fiberboard (MDF)
- Look: Pre-primed, more uniform in appearance.
- Best for: Can be interchangeable with real wood based on budget or preference.
- Cost: $0.80 to $1 per square foot.
Beadboard Paneling
- Look: Convincing from a distance, looks cheap up close.
- Best for: Ceilings and standalone projects.
- Cost: $0.50 to $0.75 per square foot.
Recommended Tools for Installing Beadboard
The specific tools you’ll need will depend on the type of project you undertake, as well as the type of beadboard you are working with. A general set of tools to keep on hand includes:
- Wall Adhesive
- Nail Gun
- Tape Measure
- Jigsaw
- Hammer
- Finishing Nails
Materials and tools aside, working with beadboard is very simple and can be used in a variety of ways. Here are a few of our favorite examples for the kitchen, bathroom and bedroom.
Planning a full scale renovation?
Be sure to start on the right foot!
Beadboard Projects for the Kitchen
Backsplash
Difficulty Rating: Low
Beadboard is also a great option for kitchen backsplashes, offering a unique look either on its own or paired with a more traditional tile arrangement. The Frugal Homemaker’s “DIY Beadboard Backsplash” project offers a great example of a complete backsplash installation incorporating white beadboard with matching cabinets and trim.
Kitchen Island
Difficulty Rating: Medium
A kitchen island is a great place for some beadboard. The vertical ridges (also known as “beads”) paired with a bit of molding on the outer edges will add texture and depth to your kitchen’s most visible feature.
Remodelaholic’s "Fabulous Kitchen Island Makeover" is a great example of how beadboard and molding can drastically improve the look of a plain kitchen island. This design also incorporates corbels to add some additional flair for those overhanging countertops. These two elements combined will turn any drab island into the most striking feature in your kitchen.
Beadboard Projects for the Bathroom
Walls and Trim
Difficulty Rating: Medium to High
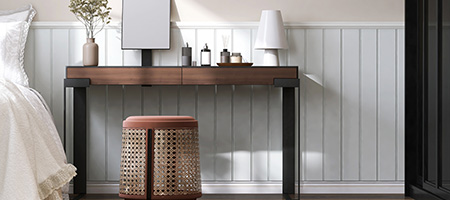
No discussion about installing beadboard is complete without mentioning the bathroom. Adding beadboard panels and trim to your bathroom walls can turn a rather dull area into a vibrant and fun space.
Marty’s Musings’ guide to installing beadboard paneling provides a great how-to for those who plan on installing beadboard from wall to wall and floor to ceiling. Fair warning: if you currently have tiles on your walls, then you will need to either scrape the adhesive off along with the tile or completely remove and replace the underlying drywall.
Ceilings
Difficulty Rating: Medium to High
Yes, even your bathroom ceiling can get the beadboard treatment. The House of Smiths’ beadboard ceiling project shows exactly what a couple of boards and a single slab of beadboard can do for a bathroom. The steps are relatively straightforward, the real difficulty is working almost entirely on a step ladder. But with a little elbow grease and a tall helper, you’ll end up with the best bathroom ceiling in the neighborhood.
Beadboard Projects for the Bedroom
Beadboard Headboards
Difficulty Rating: Low
I bet you never thought of using beadboard for a headboard (try saying that three times fast). There are many different ways to build a DIY headboard, but Ana White’s twin bed beadboard project offers one of the least expensive and most decorative options. Her project incorporates crown molding and trim, giving the headboard that extra wow factor. Though this design is for a twin-sized bed, it can easily scale up to any size bed frame with the proper measurements.
Shiplap Walls
Difficulty Rating: Medium
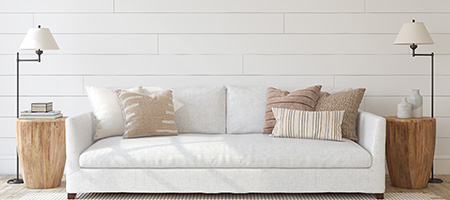
While we are all about beadboard, there is a similar plank design you can use for your bedroom walls called shiplap. Instead of vertical ridges made to look like wooden planks, shiplap uses horizontally aligned planks to achieve that vintage farmhouse look. Take a look at Table and Hearth’s DIY shiplap wall guide to learn how easy it can be. All it takes is a trip to Home Depot, some spackle and a nail gun to achieve this rustic, yet modern bedroom wall.
Not sure which beadboard project to start with? If you’re new to the DIY space, we recommend building a beadboard headboard first to familiarize yourself with the material. After that, you can start working on some of the more involved projects, including something as challenging as this complete beadboard ceiling replacement.

