Cut Remodeling Costs and Install a Kitchen Backsplash Yourself
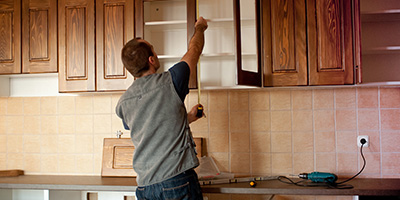
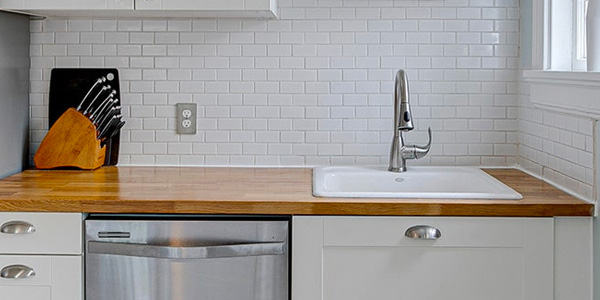
Install a Kitchen Backsplash Yourself
If you’re remodeling your kitchen, you could be looking at a price tag as low as $4,000 up to some $50,000 or more. Of course, that depends on the scope of the project, materials and where you live. Still, even the low end can be kind of pricey.
But not all elements of a kitchen remodel need a professional. Installing your own kitchen backsplash is a simple enough DIY project for any homeowner. Not only will you save on your backsplash cost, you’ll have the satisfaction of putting your own touch on your remodel.
Choose the Type of Backsplash
The first step in completing a DIY kitchen backsplash project is choosing what type of material you want to use. This can depend on how much you want your kitchen backsplash to cost, your skill level and what kind of long-term maintenance you’re comfortable with. We’ve outlined some kitchen backsplash ideas below and the cost for materials. For professional installation, costs can increase about $10 per square foot on average, so doing it yourself can lead to big savings.
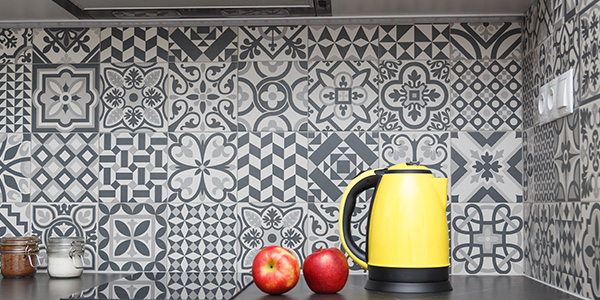
Ceramic Tile
While there are so many types of tile to choose from, ceramic tile is the tried-and-true backsplash option. But while common, it does take some skill to install.
Price
Ceramic tile comes in a variety of sizes, thicknesses and decorations. The options you choose will dictate what you pay per square foot. On average, machine-made glazed tile can range from $1.25 to $15 per square foot. Ceramic tile with a metallic finish can range from $10 to $50 per square foot.
Handmade tiles are also an option, but they can get pricey. Tiles with inlaid designs, for instance, can cost between $50 and $100 per square foot. And hand-painted tile can cost as much as $100 a piece. Fortunately, there’s a less expensive option we’ll discuss later that gives you those same cool tile designs.
Difficulty
You don’t need to be a pro remodeler to install a ceramic tile backsplash. With proper planning and time, it’s a perfectly workable job. But there are some intermediate-level skills you should have to get it done right. Be prepared to use a hammer and chisel to remove old tile, as well as a wet saw, tile cutter or nippers to cut the new tile. You’ll also use a trowel to apply mortar and grout.
Pros and Cons
The good news is, cleaning a ceramic tile backsplash is easy — provided you keep up on sealing the grout. You’ll need to seal most grout products every one to three years. If you don’t want the extra work of resealing grout every few years, you should consider a kitchen backsplash idea that doesn’t require grout.
Compared to non-tile backsplash options, you can’t beat the durability of ceramic tile. Their hardness makes them highly resistant to damage, as well as water and moisture. As a result, they are less prone to germs and mold. But because tile is so durable, if you decide to redo your kitchen one day, know that removing and replacing ceramic tile will be a process.
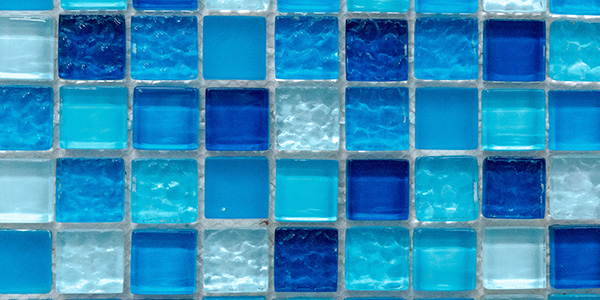
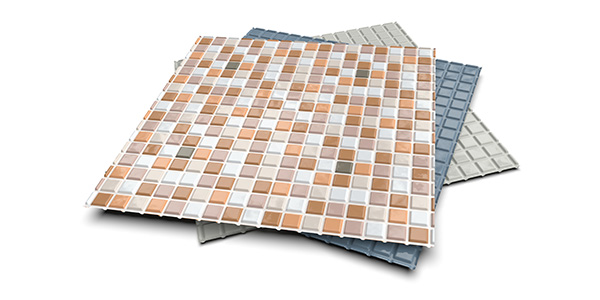
Mosaic Tile
Glass mosaic tile has some benefits over its ceramic counterpart.
Price
Cost, however, isn’t one of them. On average, expect to spend about $18 to $30 per square foot. Mosaic tile is typically sold in sheets.
Difficulty
There isn’t much difference between ceramic and glass tile installation. You’ll use the same processes and adhesives to apply glass tile to your wall. Just remember you’re working with glass. Be a little more careful with them during installation.
Once installed, glass mosaic tile is quite durable. When you consider the low-impact life of a kitchen backsplash, glass mosaic tiles can last just as long as ceramic or stone.
Pros and Cons
A big advantage to choosing glass over ceramic is the versatility. Glass tile comes in any number of colors, shapes and sizes, giving you seemingly endless customization options. And since they’re transparent, they’re better at reflecting light. This can make your kitchen appear bigger and brighter, and is a great idea for small spaces.
Even better, they’re much easier to clean than other options. Glass is non-porous, so it’s fully resistant to staining, germs and mold. And fingerprints, food splatters and water spots are easily wiped away with a damp towel.
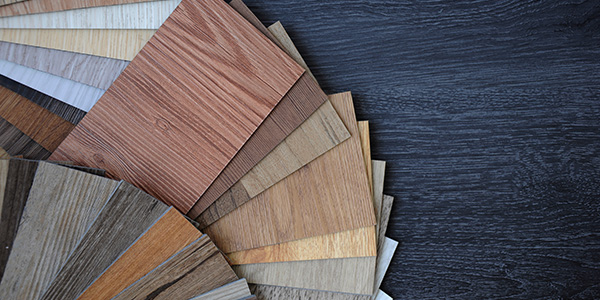
Laminate
Looking for a low-cost alternative to a tile backsplash? Laminate is a great kitchen backsplash idea if you’re on a budget.
Price
On average, you can expect to spend about $3 to $11 per square foot of laminate. It’s pretty easy to work with too.
Difficulty
Many non-tile options are peel-and-stick, so you won’t need to use mortar or grout. This reduces the time investment to both install and maintain your backsplash.
Laminate is also nonporous, which makes it water-resistant. Choose from a variety of designs, from solid colors to imitation stone and funky geometric patterns. And using laminate flooring for a kitchen backsplash can give your space a cool wood-like finish without the wood.
Pros and Cons
It’s easy to keep a laminate backsplash clean. A wet sponge and some dish soap are usually enough to clean messes and cooking splatter.
You will take a hit with durability, however, as some laminate products are easily scratched. But again, backsplashes are typically low traffic, so that shouldn’t be too much of a factor. Just be careful with your tools during installation. One wrong move could lead to a permanent eyesore.
While a great choice for most of your backsplash, it’s best to avoid using laminate backsplash directly behind your stove. Its heat-resistance is moderate at best, so it can be easily damaged by hot pots and pans.
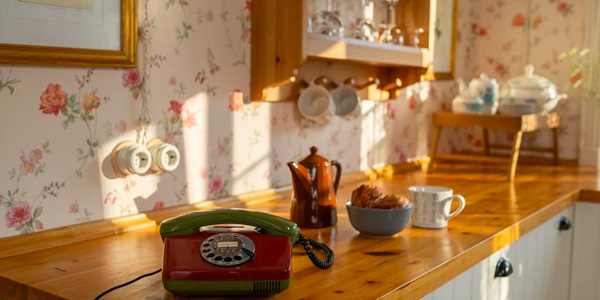
Wallpaper
Believe it or not, wallpaper can be a nice non-tile backsplash alternative for anyone who is either lacking in DIY skills or isn’t very confident in the permanence of tile. It can also be a safe way to add some pop to a dull kitchen if you’re renting.
Price
Along with its simplicity, wallpaper can be very cost-effective. The average cost ranges from $15 to $50 per roll. To give you an idea of how much you’ll need, you can usually wallpaper an entire 10×10 square foot room with six rolls.
Difficulty
There are many wallpaper types you can choose from. Peel-and-stick wallpaper makes this an easy job because you can pull it off and reapply as needed. Ideally, you’ll want something that’s easy to wipe clean. Vinyl wallpaper is your best bet for this purpose.
Pros and Cons
You can typically clean wallpaper using household products. A small amount of dish soap mixed with warm water should get the job done. Use a soft sponge or cloth to lightly wipe the wallpaper, then rinse with a separate cloth with just warm water. Then, dry with a clean towel.
We recommend avoiding fabric or textured wallpapers, as they aren’t easily cleaned.
Tile Decals
If you already have a tile backsplash and are a little intimidated by the prospect of taking them out and putting in new ones, consider tile stickers and decals.
Price
Sheets of tile stickers can cost a few dollars up to $30 or more. You can usually find them at big box hardware stores or online retailers like Amazon and Etsy.
Difficulty
If your tile surface is clean and dry, applying decals is an easy peel-and-stick solution. Just be sure to have a steady hand.
Pros and Cons
Peel-and-stick decals add color and design to any boring tile surface. Whether you want to add a simple line of decals to accent your backsplash, or give your backsplash the look of marble, the sky’s the limit.
We recommend finding vinyl decals for a waterproof option. Be sure to use a size that won’t overlap your grout either. That will allow moisture to get in, forcing your decals to curl.
Vinyl Tile
One popular alternative to a tile backsplash is vinyl. It’s a great kitchen backsplash idea if you’re on a budget and it’s simple to use.
Price
The cost savings are significant. On average, vinyl tile costs $2 to $10 per square foot. And since you don’t need advanced DIY skills, you’ll save on getting the job done quickly on your own.
Difficulty
Vinyl tile come in panels that you fit together on your wall. We recommend using the types that have interlocking edges. The pieces fit together like a puzzle and won’t leave a noticeable seam.
Like other non-tile options, vinyl tiles are usually peel-and-stick. Keep in mind the adhesive does its job very well. If you find yourself needing to lift and re-stick a sheet of tile, you could end up damaging the tile or the wall itself.
Pros and Cons
Virtually all backsplash designs are available in vinyl form. This includes subway tile, herringbone, mosaic and even 3D surfaces like faux stone. The downside is vinyl isn’t as water-resistant as ceramic tile, or even some other non-tile options.
Not sure which tile is best? Check out our guide on how to choose tile for every room in your house!
How to Install a Tile Backsplash in 9 Steps
Ready to move forward with a traditional ceramic tile backsplash? We salute you! This certainly takes a bit more DIY confidence than some alternatives to a tile backsplash. But with careful planning, the proper tools and a couple days of work time, you’ll have a great looking backsplash you can be proud of.
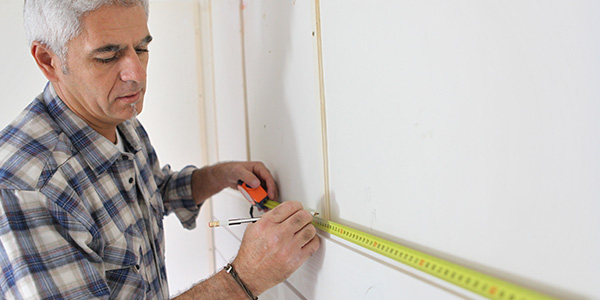
1. Measure Your Space
Once you’ve picked out the type of tile you want to use, it’s time to plot out how it will all fit. Use a tape measure to calculate the square footage of the space you want to tile. This will help you figure out how much tile you need to buy.
How to Measure Your Backsplash
If you’ll be working around cabinets, separate the sections of your wall into their own areas and measure them. Multiply the height by the width to get square footage.
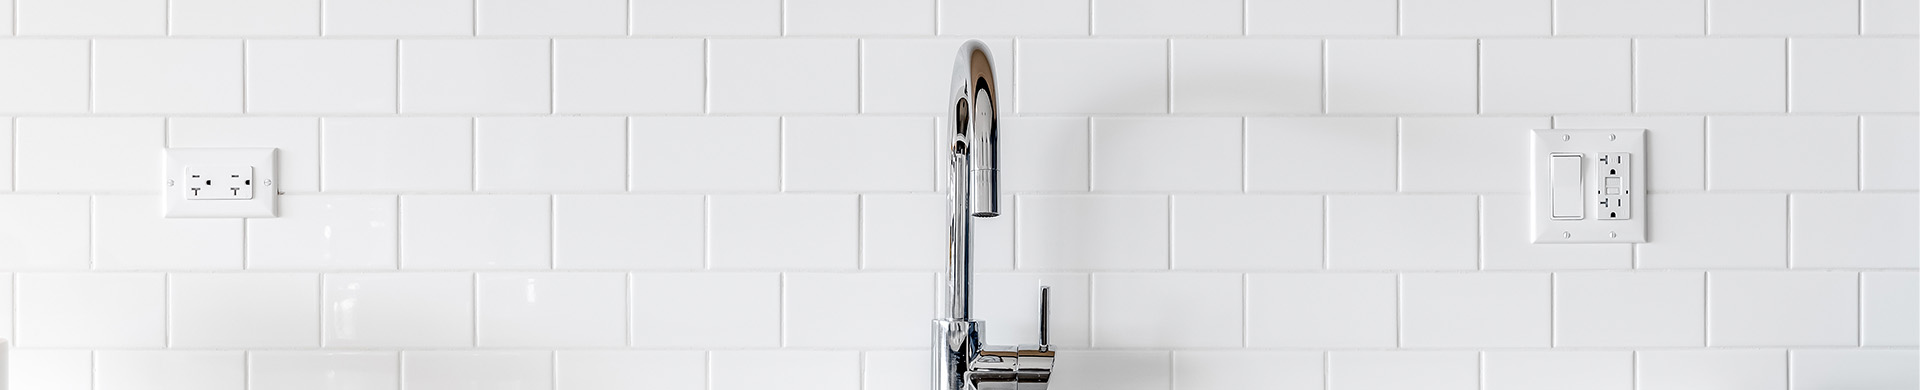
Be sure to account for electrical outlets and switches in your measurements. Also be sure to include room for tile spacers, which can range from 1/16 to 3/8 of an inch.
Factor in the size of your tiles to calculate how much product you’ll need to cover your wall. This also helps you figure out how much mortar and grout you need. It’s a good idea to add 10% of the total square footage. Having some extra tile will come in handy if you need to fill small spaces or if a few break along the way.
2. Gather Materials
Here is a list of tools and materials you’ll likely need for your DIY kitchen backsplash:
- Tile
- Spacers
- Mortar or pre-mixed mastic
- Notched trowel that matches your tile size
- Tile cutter, wet saw or nippers
- Bucket and water
- Safety glasses and gloves
- Masonry hammer and chisel (if removing old tile)
- Scraper
- Spackle
- Sandpaper
- Carpenter’s pencil
- Level
- Rags
- Painter’s tape
- Drop cloths or heavy-duty builder’s paper
- Grout and grout floats
- Sponges
- Caulk and caulk gun
- Drill and mixing arm
- Rubber mallet
- Tape measure
- Utility knife
- Outlet extenders
- Screwdriver
3. Prepare Work Space
Remove appliances, cookware and any other furnishings from your countertops. If you’re tiling the wall behind your stove, move it slightly away from the wall.
Shut off power to any electrical outlets or light switches in your work space. Use a screwdriver to remove the cover plates.
Cover all countertops with drop cloths or builder’s paper held in place with painter’s tape. Be sure to tape off the underside of any cabinets to protect them.
4. Remove Old Tile and Clean Wall
When installing a ceramic tile backsplash, you need a smooth, clean surface to work on.
If you’re replacing old tile, start by scraping between the pieces to remove the old grout. Wear your safety gear and use your masonry hammer and chisel to remove the old tile. Don’t use too much force. You don’t want to smash through your wall.
Cover patches of leftover tile adhesive with a citrus-based adhesive remover. You can find this at most home improvement stores. Once the remover is set, use a scraper to work up the loosened material. You might need to use your hammer and chisel to remove larger pieces of mortar.
Spackle any holes and lightly sand them smooth. Clean the walls with mild soap and water, then let them dry. Use a degreaser to clean any tough oil or grease stains.
If you’re tiling a painted wall, clean it with tri-sodium phosphate and gently sand the area.
Pro Tip
Keep the area ventilated when using adhesive removers and while sanding. Open windows and use a fan.
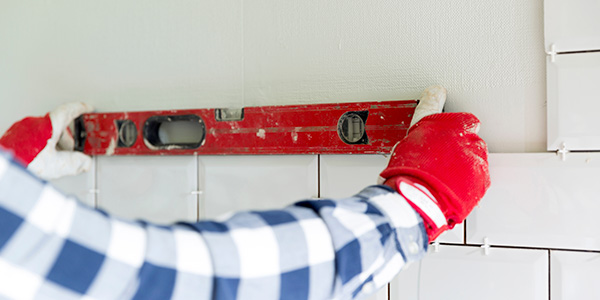
5. Plot Your Start and End Points
Before you start slapping mortar on your wall, it helps to have your tile positions marked. We recommend starting at the centermost point of your wall or the most viewable spot of the area. Work up and out from there using a level to make your marks even.
If you’re using larger pieces of tile, you can lay your materials against the wall to get an idea of how it will look. Use a pencil to rough out the tile positions as you go.
For projects using smaller tile pieces, we recommend starting with the bottom row and working your way up. Consider leaving a small space between the bottom row of tile and the countertop. Rather than grout this space, you can seal it with a line of caulk afterward.
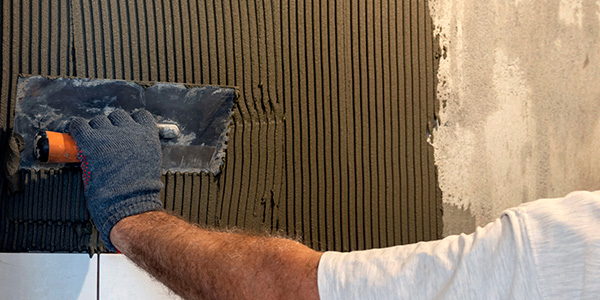
6. Time to Install Your Tile Backsplash
The moment of truth! Take a deep breath. You’ve got this.
First, get your adhesive ready to go. A pre-mixed mastic cuts down on the completion time for your DIY backsplash. But it doesn’t always have the bond strength of a mixed thin-set mortar. If you’re using a mortar, follow the mixing instructions on the package. Mix your product in your bucket using your drill with mixing attachment.
Keep in mind that you usually have about four hours to use your mortar after mixing it.
Work in sections of a couple feet following the lines you made in the previous step. Use the flat side of your notch trowel to spread a thin layer of adhesive to the wall, pressing at a 45-degree angle. Add a bit more mortar to the notched edge and run it along the section, making even ridges in one direction.
Lay the tile pieces along the wall, adding tile spacers as you go. This keeps the tile pieces lined up and leaves a space for grout.
Gently rock the tiles in a motion perpendicular to the mortar ridges. This helps the tile set into place. A grout float helps flatten the tile if needed. Use a level as you work to ensure things are even.
Continue working in two-foot sections, applying mortar and laying the tile.
7. Cut Tile As Needed
When you come up to an outlet or light switch, you’ll need to make some cuts. For ceramic tile installation, you have a few cutting options that vary in ease of use, quality of cut and price. Consider renting tools from your local hardware store to reduce your backsplash project cost.
Ways to Cut Tile
Wet Saw
A wet saw gives you the best possible cut and is great for easily making straight, curved or mitered cuts. But that versatility comes with a hefty price tag. Expect to spend $500 or more to buy a new wet saw. Rentals can run from $29 to $63 per day depending on the size of the saw.
Water and debris fly everywhere, so work outside and always wear your eye protection. Wear gloves too to keep a firm hold on your tile. Since this is a power tool, you’ll need access to electricity.
Professional skills aren’t necessary to use a wet saw, though it is recommended if your cuts are very intricate. It does make the process faster though. For large jobs, a wet saw is the way to go.
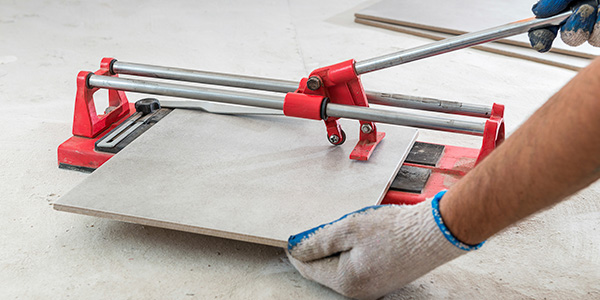
Tile Cutters
Tile cutters are the next best way to cut tile without a wet saw. They take a little more time to use and won’t make as clean of a cut as a wet saw. But they are much more convenient — and not as scary.
Expect to spend a couple hundred dollars on a good tile cutter, or rent one from a big box hardware store for about $17 per day. They are portable and safe to use indoors, as they don’t kick up as much debris as a wet saw. You do lose some versatility though, as tile cutters are only good for small, straight cuts.
Use the tile cutter to score the tile along your marked line. Then, apply a little pressure to snap the tile along the scored line by hand. It doesn’t take much effort to use tile cutters, so this would be an ideal solution for a DIY kitchen backsplash.
Bear in mind the tile cutters work great for ceramic and other softer options, but you can’t use them for hard porcelain tile or glass.
Tile Nippers
Tile nippers are another option for cutting tile. At $15 or less for a good pair, nippers are by far the most affordable option, though a little more time-consuming.
Using a pencil or marker, make a line where you need to cut. Score a slight groove along the line with your utility knife.
Use your nippers to snip away small pieces of tile while working your way toward the line from the edge of the tile. You don’t want to snip away pieces that are too large, because you risk cracking the whole tile.
When you get to the line, use a piece of 60-grit sandpaper to smooth the edge. Use a damp rag to wipe off any residue and clear your marks.
Pro Tip
Don’t worry if your cuts aren’t perfect. You’ll hide them with the outlet or light switch faceplate.
Try to keep an inch or less of space between the top row of tiles and your cabinets. You can always use your extra tile to fill in spaces if needed. Once you’ve placed all of your tiles, you’ll need to let everything dry for 24 hours before moving onto the next step.
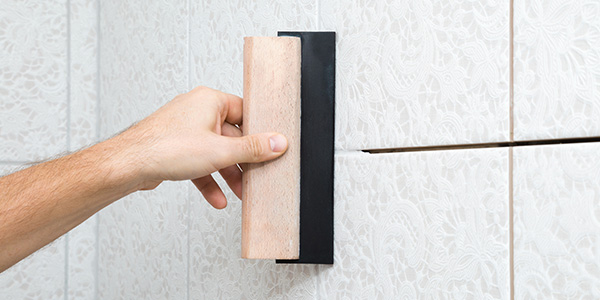
8. Grout Your Tile
Once everything dries, you’ll need to apply grout. Be sure to keep a bucket or two of water nearby with plenty of sponges. Once you’ve applied grout to your tile, it will dry quickly. So, you need to work fast.
If you have 1/8-inch of space between your tiles, we recommend a poly-blend sanded grout. For smaller grout lines, unsanded grout works great.
Mix your grout according to the package instructions. Use a grout float to evenly spread the grout across the grout lines and tiles. Wipe the excess grout off your tile with a second grout float. Move quickly to avoid letting the grout dry on the tile. Again, we recommend working in sections.
Use a sponge to clean off any extra grout off your tiles. You don’t want the sponge sopping wet, because that could wash the grout out of the lines. Keep it just wet enough to clean your tiles.
You may need to change your water a few times during this process. Note that the grout will need another 24 hours to fully dry.
9. Caulk the Extra Spaces
Run a line of caulk in any seams. This includes the space left between the bottom row of tiles and your countertop, as well as the space between the top row of tiles and your cabinets.
After the grout and caulk have dried, reinstall your electrical outlets and light switches. Move the outlets out so they’re flush with the face of the backsplash tiles. Place an outlet extender between the electrical box and the mounting strap of the outlet. When your outlets are secure, reinstall the faceplates.
When finished, restore power to your outlets and switches.
Looking to remodel your entire kitchen? Check out our Complete Kitchen Remodeling Guide!
Read More Like This
Now that you’ve installed your DIY kitchen backsplash like a pro, you probably see a few other areas that could use some sprucing up. Check out our guides for some more cost-effective ideas.