Keep the Heat in With This Attic Insulation Guide
How to Properly Insulate an Attic
Without a properly insulated attic, heat can more easily escape your home, increasing utility costs. An insulation barrier keeps heat from moving out of the home in the winter and blocks heat from entering the home in the summer. When you insulate an attic, you can save around 15% on future heating and cooling bills.
In this attic insulation guide, you’ll learn how to insulate an attic using blown-in or batt and roll insulation.
When to Replace Insulation in Your Attic
Insulation usually lasts anywhere from 20 to 100 years. You can add to any existing insulation without removing it, but inspect it before you do. Remove and replace any insulation that has mold, unpleasant smells, water damage or pest damage. Always replace insulation in your attic when you encounter any type of erosion.
If your home was built before 1990, the existing insulation may contain toxic asbestos. Look for grayish-brown or metallic colored pebble insulation. It is often associated with asbestos and must be removed by a professional. If you’re not sure if its asbestos or not, consult a professional to be on the safe side. Expect to pay around $2,100 for insulation removal.
Decide Which Insulation Is Best for Your Home
Before you start the installation process, you’ll have to choose the type of insulation you want in your home. There are several different types of attic insulation, but the best option depends on the climate you live in. To help you decide, check out our post on choosing the right attic insulation.
How to Remove Attic Insulation
Old insulation won’t all fit in your curbside garbage, so rent a dumpster for easy disposal. Just make sure that it does not contain asbestos, since that type of insulation is prohibited from dumpster disposal.
Before you start, close any doors and openings that lead to the rest of the house. Removing old insulation kicks up plenty of dust, and you don’t want any of that traveling through the air into your living areas.
Wear a mask, goggles, gloves and long sleeves before handling any old insulation. Remove batt and roll insulation by hand and place it in large trash bags. Be sure to tie off the bags once they’re filled to reduce the number of airborne contaminants.
If you need to remove loose attic insulation, suck it up with an industrial hose and vacuum. Insulation removal vacuum rentals work best, which you can rent from equipment and tool rental stores for around $300 a day. HEPA vacuums are best for removing mold since their filters are more effective. Start in the back of the attic and work your way toward the door. Empty the vacuum as needed and place the old material into large trash bags. Once filled, tie the trash bags and place them in your dumpster.
Interested in transforming your unfinished attic into usable living space? Check out our DIY attic remodeling guide!
What to Do Before You Insulate an Attic
1. Gather Essential Safety Equipment
Insulation is often made of fine fibers that are easy to breathe in. It can also cause irritation to your skin. Before you properly insulate your attic, you’ll want to suit up with the following equipment:
- Long-sleeved shirt and long pants
- Gloves
- Eye protection
- Mask
- Hard hat
- Knee pads
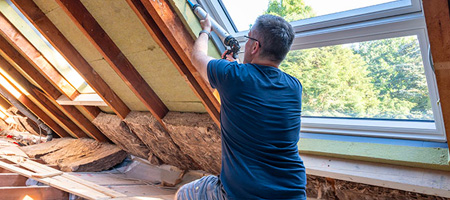
2. Seal Attic Air Leaks
Holes in your attic can cause air leaks, leading to higher energy bills. Before you hide them with new insulation, evaluate your attic’s large air gaps. These are usually found around windows, ceilings, hatches, electrical boxes, pipes and recessed lights. Use a caulking gun to seal the attic air leaks.
3. Box Off Light Fixtures
Before you add the insulation, box off any electrical boxes or recessed can lights. Even though cellulose insulation is fire-resistant, it’s not fireproof. Use four drywall patch panels to create a box around the fixture. Use a drill to add screws and keep the box in place.
4. Establish Working Airflow
Proper airflow prevents excess moisture that can lead to insulation becoming moldy. To maintain ventilation, don’t cover the soffit vents along your roof line, and install rafter vents — sometimes called baffles — in your attic. The baffle keeps air flowing from the soffit vents to the roof vents unobstructed by the new insulation.
How to install baffles:
- Use measuring tape to measure the width between your wall studs. Your rafter vent should be smaller than the width of your wall stud.
- Fold the tab at the bottom of your baffle and place the tab over your stud’s top plate.
- Using a staple gun, staple the tab to the top plate. Then staple both sides of the baffle to the roof decking.
“It’s important to ensure that the attic has sufficient air circulation to prevent moisture buildup. Improperly ventilated spaces can result in mold growth in your attic, potentially damaging insulation materials and creating hazardous indoor air environments.”
Stefan Shulz, Atticsandmore.com
How to Insulate an Attic With Blown-In Insulation
1. Gather Materials
- Blown-in loose-fill insulation
- Insulation blowing machine
- Tape measure
- Utility knife
- Insulation barrier
2. Determine How Much Insulation You’ll Need
You’ll need to know the square footage of your attic to find out how much insulation to buy. Use your tape measure to figure out the length and width of your attic in feet. Then, multiply these measurements to get the square footage. The back of the insulation package will help you determine how high the insulation should be, depending on your desired R-value. Learn more about R-value in our guide to choosing attic insulation.
“The amount of attic insulation that should be used depends on several factors, including the type of insulation, the climate you live in, and the current level of insulation in your attic. To determine how much insulation you need, measure the thickness of the existing insulation in inches and compare it to the recommended levels for your climate.”
Stefan Shulz, Atticsandmore.com
3. Install an Insulation Barrier
If you’re still planning on using your attic for storage, create an insulation barrier between the space you’re insulating and the rest of the attic. Otherwise, the insulation will spray all over the area. Determine the area of the attic that you don’t want insulation in. Take a piece of rigid foam insulation and hammer it down into the floor joists with cap nails. This will keep the barrier in place.
Pro Tip
Measure and mark your desired insulation height along the inner side of your barrier. You can add insulation and fill your attic without having to stop to measure it.
4. Load Your Insulation Blowing Machine
Install blown-in installation using an insulation blowing machine. You can rent one from home improvement stores for around $150 per day. Make sure the insulation you bought is compatible with the machine you’re renting.
To fill your machine with insulation, cut along the dotted line in the middle of your insulation package. Tear the insulation in half and load it into the machine as you peel back the plastic wrap. You’ll need a helper to continue loading the machine in half-bag increments as insulation is being sprayed.
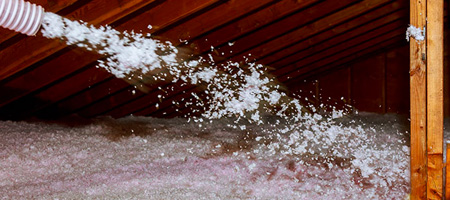
5. Fill the Space With Insulation
Attach the hose to the machine and turn it on to start blowing insulation. Begin by aiming toward the back of your attic, far from the entryway. Fill the area until you reach your desired height and R-value. Continue filling the rest of the attic evenly. As the insulation gets closer to you, aim the hose up toward the ceiling. When you’re finished, turn off the machine. Avoid packing down the insulation since this reduces the R-value.
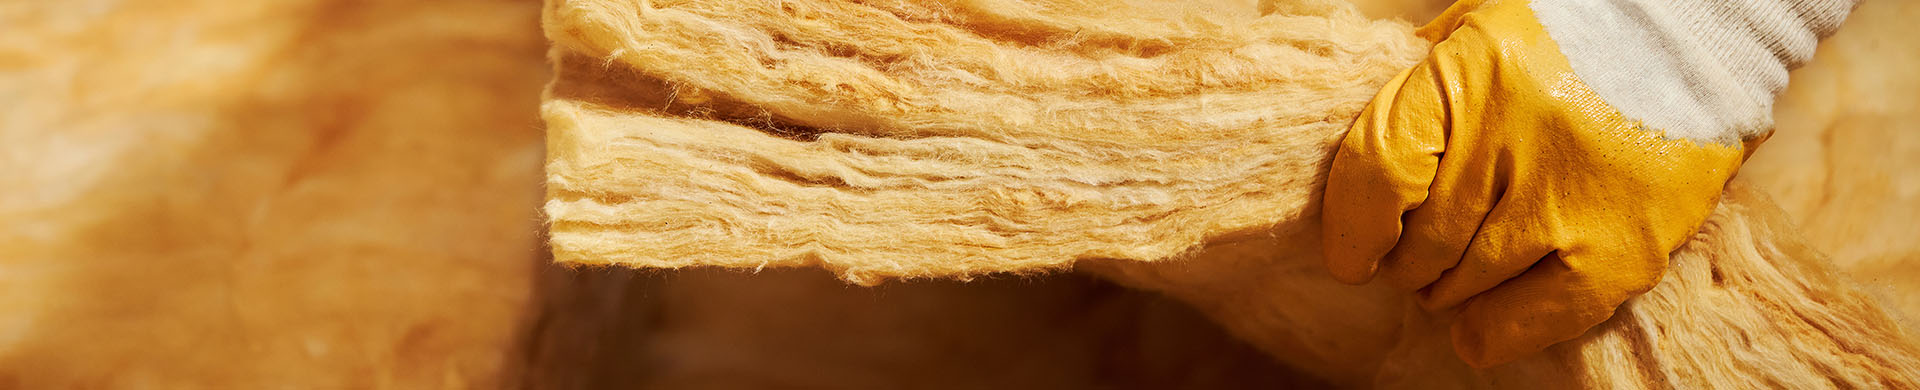
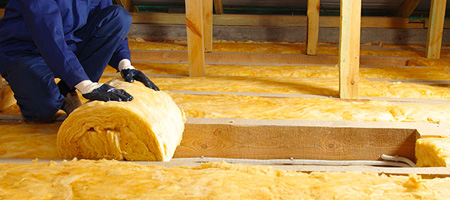
How to Insulate an Attic With Batt and Roll Insulation
1. Gather Materials
- Batt and roll insulation
- Tape measure
- Utility knife or insulation knife
- Staple gun
- Spare piece of plywood
2. Determine How Much Insulation You’ll Need
Use your tape measure to figure out the square footage of your attic. There are several different sizes of roll insulation, so compare the measurements on the package to your needs. Plan to install two layers of insulation.
Rolls are good for long areas of space and you can cut insulation to length. Batts are pre-cut pieces of insulation. They’re good for small spaces, but can be less effective because they leave gaps between sections.
Should I Get Faced or Unfaced Insulation?
Faced insulation has paper used as a vapor retarder to prevent moisture build-up. This retarder reduces the rate at which water vapor can move through the insulation, preventing mold and rotting wood. The paper barrier should face toward the inside of the home in cold climates and outward in warmer climates. Use faced insulation if you’re in an area prone to moisture.
Unfaced insulation doesn’t have a paper vapor retarder. If you’re adding more insulation to an attic that already has insulation, use unfaced insulation. However, if there is already faced insulation with the paper facing the inside of your home, you cannot stack unfaced insulation over it. This can trap moisture and cause mold build up, reducing the life of your insulation.
3. Prepare a Safe Workspace
Before you insulate your attic floor, place a piece of plywood over the joists as a work surface. Instead of balancing between the joists, you’ll be able to kneel on a stable workspace.
4. Insulate Attic Floor Joists
Begin adding insulation in the area farthest away from your attic door. For your first layer, fill each cavity with insulation between the joists. Don’t press on the rolls firmly. Make sure to also tuck insulation in the hard-to-reach spaces.
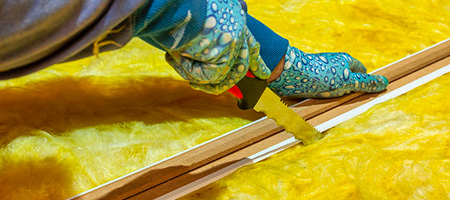
How to Cut Insulation
If you to need to customize the size of your roll, cut it to fit your needs. Use a tape measure to measure how much insulation you need between each floor joist. Use a straightedge such as a yardstick or a spare 2×4 and precut a straight line along the insulation with your utility knife or insulation knife. Then, make a complete cut all the way through following that precut guide.
5. Add a Second Layer
Insulating your attic floor with a second layer will increase R-value and cut heat loss. To add the second layer, start by insulating near the underside of your roof with small pieces in tight spaces. Place the insulation perpendicular to the joist, starting farthest away from door again. Continue to add insulation until you reach the door.
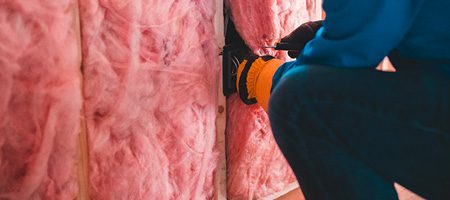
6. Insulate Attic Ceiling
To insulate the underside of a roof, start at the bottom where it meets the floor. Place the attic wall insulation into the cavities between the studs and over the baffles you installed previously. The process of insulating an attic ceiling is similar to the floor, but you might have to support the insulation. Staple the insulation in place to the wall or stud edges.
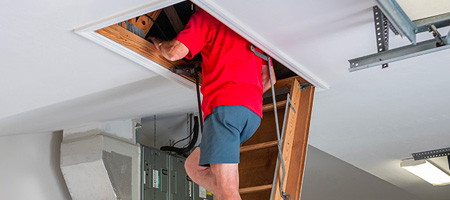
How to Insulate an Attic Door
Once you’ve properly insulated your attic, don’t forget about the door. One simple way to seal attic air leaks from the door is to install weather stripping.
How to install weather stripping on your attic door:
- Open your attic door and cut a piece of weather stripping to fit the length of all four edges of the door trim.
- Peel back the tape layer and press the adhesive firmly against the door trim.
- Add adhesive to a foam board. Attach the foam board to the back of the hatch.
“To insulate the attic access, you can use an attic hatch cover or install insulation around the edges of the door frame. It’s also important to seal any gaps or openings around the door to prevent drafts and air leakage, which can be done with weather stripping or other sealing materials. Insulating the attic access can help reduce your energy costs and make your home more comfortable year-round.”
Stefan Shulz, Atticsandmore.com
Take the Next Step in Upgrading Your Attic
Whether you use this attic insulation guide to install blown-in or batt and roll insulation, you’ll stay comfortable and save on utility costs. But that doesn’t mean the upgrades have to stop there. Looking to improve your space beyond a properly insulated attic? Consider these upgrades.