DIY Paver Patio Installation Guide
How to Build a Paver Patio
Tired of keeping up with annual staining and fixing warped boards on your wooden deck? Tear out your old deck and switch to a lower-maintenance paver patio.
According to Bob Vila, the labor cost of having a paver patio installed is about $50-80 an hour, or about $4-11 per square foot, but you can save a lot of money in your budget by tackling the project on your own. Follow these 8 steps to install the paver stones and design a professional-looking patio yourself.
How to Build a Paver Patio in 8 Steps
1. Select Paver Type, Shape and Size
The first step in planning your DIY paver patio is to pick out the size and shape of the pavers you will be using. Square or rectangular blocks are fairly easy to arrange, so if you have a specific area you want to cover, one of these is your best option. If you are more flexible on space, you can consider natural stones like flagstone or slate. However, it will take more careful planning to fit the unique and various shapes into your patio.
After you’ve selected which type of pavers you’ll use, plan out the size and shape of your patio. Calculate the square footage of your desired patio area, adding between 10 and 15% to account for pattern matching and mistakes. This number will be important when buying your supplies.
What Is the Best Type of Paver for You?
Before you install your patio pavers, you will also need to decide which paver material will work the best in your yard.
- Concrete pavers are popular because they are available in a large variety of colors, textures, finishes and sizes. Concrete is also durable and can hold up to harsh weather.
- Brick pavers have similar benefits to concrete, but are typically a smaller size. They are available in a variety of colors and are a standard size that can fit a variety of layouts.
- Flagstone pavers offer a variety of size and color choices but can be difficult to arrange due to their unique shapes and sizes. They also tend to be more expensive.
- Slate pavers are a budget-friendly alternative to flagstone. While they tend to look similar, they are available at a lower price point.
- Travertine pavers are good for areas with lots of sun, as the material naturally reflects heat and will remain comfortable to walk on. They are also durable and will hold up to high traffic.
2. Collect Paver Tools and Materials
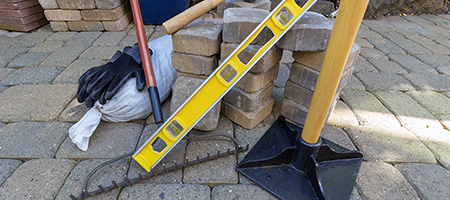
Required Tools:
- Framing stud or 2×4
- Shovel
- Circular saw with tile saw blades or masonry saw
- 1” outer diameter conduit or PVC pipe
- Rubber mallet
- Garden rake
- Plate compactor or hand compactor
Patio Materials:
- Paver stones
- String and stakes
- Paver edging
What to Put Under Your Pavers
When purchasing materials, keep in mind that you will need 2-3 inches of gravel and 1 inch of polymeric sand laid under the entire patio.
Paver Base Materials:
- Polymeric sand
- Gravel
3. Mark the Patio Area
As you begin to build your paver patio, use stakes to mark the corners of your patio and tie the strings between them to fully outline the space. These strings will be your guide when digging your grass and dirt so you won’t have to dig out any further after you’ve started laying your pavers.
The finished patio should slope away from your house just slightly, about 1 inch down over a 4-inch span. An easy way to do this is to tape a 1-inch block of wood to your bubble level, 4 inches from the end. Then place the level on the ground, with the wood end away from your house. If you choose, you can even adjust your string to match this level to help you keep your patio flat as you install the pavers.
Why Should a Patio Slope Away from the House?
The slope in your patio ensures that water will run off your patio into your yard and away from the house. Water pooling around your home’s foundation can cause damage, so it’s important to take preventative steps and keep water away.
Find additional ways to improve your yard’s drainage here.
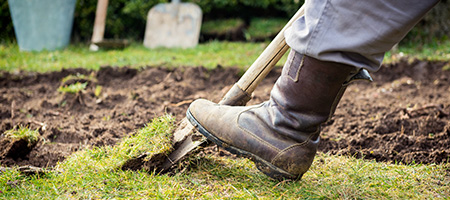
4. Clear Grass and Soil
Once the patio area has been marked, you can start to dig out the dirt and grass. If you’re using a patio edging, which we would recommend, be sure to dig outside of your marked area to account for the edging material. Remember that you will not lay your patio pavers directly on the dirt, so dig down 3-4 inches plus the height of your selected pavers. Use the strings as a guide and be sure to keep the dirt angled downward, using your bubble level to keep it consistent.
Depending on how large your patio will be, you may end up with a lot of grass and soil to get rid of. Make a plan for disposing of yard waste ahead of time, and learn the best way get rid of rocks if you’re working on a rough area.
Not sure what to do with all that excess grass and soil?
Learn how to dispose of yard waste the right way!
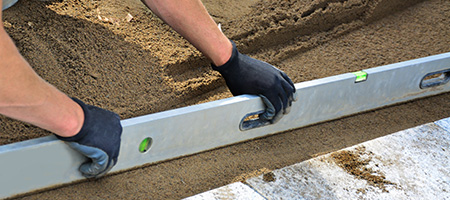
5. Lay Paver Base Material
Before laying your patio pavers, you need to prepare the ground and make sure the area is level. Pour enough gravel to cover the entire patio space, about 2-3 inches thick. Drag the framing stud or a 2x4 over the gravel to create a flat, smooth layer. Keep your bubble level out to make sure the slope is even across the entire surface.
Once you’ve laid the gravel, place your 1-inch PVC pipe along the edge of the patio area to prepare for the sand. This pipe will be your guide to make sure the layer is the appropriate thickness. Pour the sand, being careful not to ruin the level of the gravel in the process. Then use the 2x4 again to create a smooth, even surface, using the PVC pipe to ensure a consistent, flat layer.
Paver Base Alternative: Paver Mats/Panels
If you don’t want to use gravel, you might be wondering what else to put under your pavers. A more modern option is a paver mat, also known as paver panels. Distributing the weight on the patio, these panels are easier to install than gravel while performing the same function. While the installation of each paver mat may differ slightly, most will only require a layer of sand underneath.
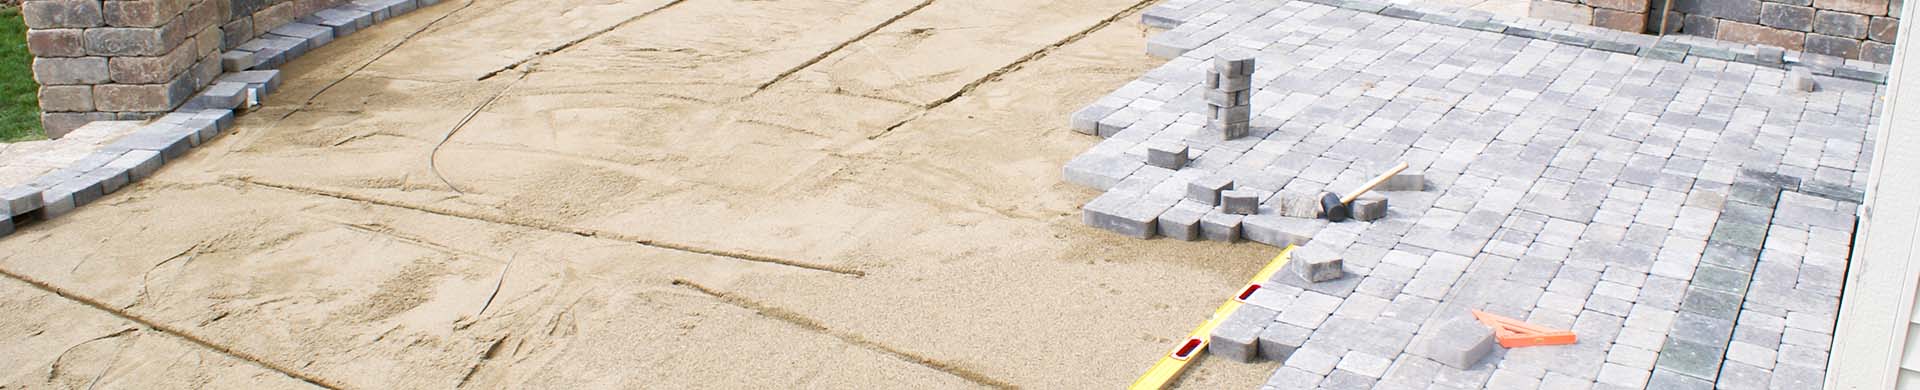
6. Install the Paver Stones
With all the prep work complete, you’re ready to install your pavers. Start laying your stones at the edge of your patio, preferably along a hard edge like the outside wall of your house, a deck or your driveway. Lay the pavers in your pre-determined pattern, leaving about a ¼-inch gap between them. The best way to keep an even surface is to level your pavers as you go, remembering the slope. If any given paver is slightly higher than the others, tap it down with a rubber mallet. If it’s too low, add a little more sand underneath until you get the right height. You can use the 2x4 as an easy gauge to make sure your pavers are even with each other.
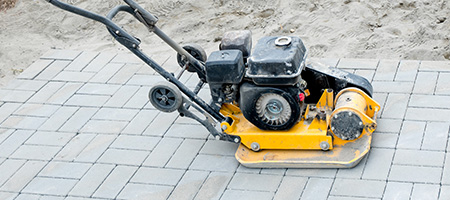
Once your pavers are installed, use a plate compactor to set the pavers firmly in place. Since a plate compactor is not a tool many homeowners have laying around, they can be rented from your local hardware store. If you’re nervous about damaging the pavers, you can lay a sheet of plywood or a thick cloth like a moving blanket over your patio before running the compactor.
Cutting Paver Stones to Fit With a Circular Saw
Some patio designs will require cutting pavers along the edge to fit with your pattern. Most pavers can be cut using a circular saw with a masonry blade. First, mark the paver where you need to make the cut. Set the saw blade to a shallow depth, about 1/8 to 1/4-inch. Make your first cut in the top of the paver. Then, make the same cut on the underside. Finally, tap on the waste section of the paver with a hammer to break it off along the cut.
7. Add the Patio Edging
After you’ve installed your pavers, it’s time to add the edging. If you are using edging stones, simply lay them in the same way as you laid the pavers themselves. Edging stones should be placed on top of the same gravel and sand base as your patio.
If you don’t want to use edging stones, you can purchase plastic paver edging products, which are also known as paver restraints. The installation for these products will vary, so follow the provided instructions to secure your edging. A common installation method involves butting the edging up to the stones and driving a large nail through the plastic and into the ground. Plastic edging has the advantage of being buried completely, leaving only the patio pavers visible.
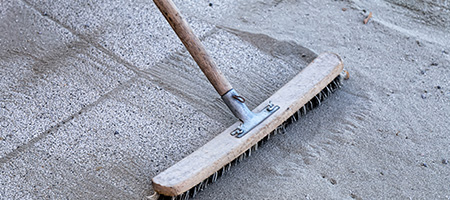
8. Add Sand Between Pavers
Finally, you need to fill in the gaps between your patio stones. Simply pour a pile of polymeric sand onto your pavers and sweep it into the cracks. You may not know how much sand you’ll need to fill in all the cracks, so add small piles of sand as you go to prevent a big cleanup afterward. Unless you have a lot of leftover sand, you can simply sweep the remainder onto your lawn.
Make Your Backyard a Perfect Summer Oasis With These Projects
Now that your DIY paver patio is complete, what else does your yard need? If you’re ready to tackle other home improvement and curb appeal projects, check out these helpful guides to get started:


