Knocking Down a Wall: An Easy Guide to Creating an Open Floor Plan

Knocking Down a Wall
Open floor plans are a popular home design. Merging rooms together can allow for more light, more space and an improved sense of flow in many houses. If you live in a home with an outdated and closed-off floor plan, you can create more space by knocking out the wall between two rooms. It’s a big job, and it’s not right for every home. But in some cases, learning how to knock down a wall is a clear-cut project that can really open up a home.
Use this guide to learn how and when to do this DIY project.
Before Knocking Down Your Wall
Determine If Your Wall Is Load-Bearing
Before you even begin planning your project, you’ll need to determine if the wall you’re looking to remove is load-bearing. Load-bearing walls support the weight of your home from the roof down to the foundation and are absolutely necessary to your home’s structural integrity. Check for signs on your own and if you’re still interested in proceeding, hire an engineer or an architect to inspect the wall.

“An engineer is going to look at the structure and see how it was built. Older homes are pretty straight forward but our modern homes are actually pretty complicated structures. Is the wall load bearing or not? Is it carrying floors? How does that wall carry or not carry loads to the soil or foundation below?”
Scott Zurn, P.E., Level Engineering and Inspection
If your wall is not structural: You can proceed on to step two of this DIY project.
If it is load-bearing: Continue your conversation with an engineer to determine if the project is feasible on your budget and will still meet your project goal. Tearing down a load-bearing wall is not a DIY project. You will need to hire more experts to help you with this project.
What Does It Cost to Knock Down a Wall?
If you’re removing an interior, non-load-bearing wall, the project can cost $1,000 or less, depending on the number of professionals you bring in and how much of the project you complete on your own.
Removing a load-bearing wall is more expensive, costing up to $3,000 for a single-story house and between $10,000 and $20,000 for a multi-story home.

“If [removing a wall] isn’t done incorrectly, in five years we can see the ceiling sagging and drywall cracking and overall poor performance of the house. It looks fine for a few years but actually the problem shows up later showing that the wall was important.”
Scott Zurn, P.E., Level Engineering and Inspection

Find Out What Is Inside Your Wall
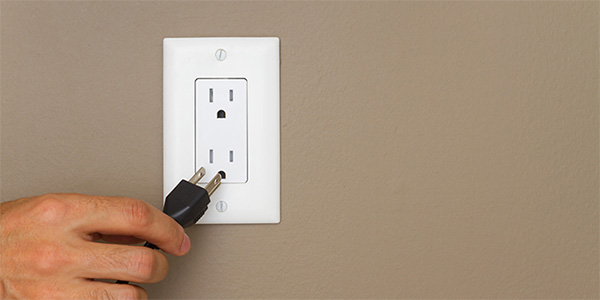
If your wall has outlets on it, it contains electrical wiring. If there are vents in the wall, then it contains HVAC ducts and pipes. If the wall supports a sink, tub, toilet or washer/dryer then it contains plumbing.
If it’s not obvious what the wall contains, use these steps to determine if there is anything inside:
- Head to the basement: If your wall is on the first floor and you have an unfinished basement, you should be able to look up under your wall and see if any utilities disappear up into the wall.
- Cut a hole in your drywall: If your basement doesn’t provide any clues, use a utility knife to cut into the drywall and shine a flashlight or use a digital viewer to look into your wall for pipes, wire and anything else.
- Hire a contractor: A professional will be able to tell you easily, and for a pretty nominal fee, what utilities are in your walls. It will be slightly more expensive to have them get the utilities out of the way for you before you begin demolition.
How to Knock Down a Wall With an Outlet
Hire an electrician. If you have active electrical wiring in your wall, the safest way to make sure it is taken care of correctly is to hire a professional. This also applies to any piping or ventilation in your walls. Hire a contractor to remove, relocate or cap off any utilities and avoid breaking codes or doing damage to your home.
If your home was built before 1978, you should also have your walls checked for asbestos and lead paint before you start knocking them down.
Gather Tools and Materials Needed to Knock Down Your Wall
Once you’ve determined your wall is the right fit for DIY demolition, gather your materials and get ready to tear down some drywall.
Tools:
- Pry bars
- Utility knife
- Stud finder
- Sledgehammers
- Reciprocating saw (with a blade strong enough to cut through nails)
- Trowels (various widths)
- Electric drill
Materials:
- Plastic sheeting
- Painters tape
- Goggles
- Dust masks
- Work gloves
- Flooring
- Dumpster rental or other waste removal solution
Materials to Patch the Ceiling:
- 12, 2×2 or 1×2 wood strips
- Drywall (for ceiling patch)
- Drywall compound
- Drywall Tape
- Drywall screws
- 6 to 10, 2 inch by 2 inch or 1 inch by 2 inch wood strips about 6 inches long
You will also need to determine whether or not you need a permit from your city. If you are removing a non-structural wall, you probably do not need a permit, but it’s worth double-checking.
Check Out Dumpsters Near You
How to Knock Down a Wall
Step 1: Prepare for the Demolition
Prep the rooms on both sides of the wall you are removing. Knocking down a wall will create a lot of dust and debris. Protect the rest of your home by taking the following precautions:
- Lay down a tarp or a sheet of plywood over the floor. Plywood will better protect hardwood, ceramic tile or other fragile flooring types.
- Cover vents in both rooms using plastic sheeting and tape to prevent dust being blown throughout your house.
- Use a plastic sheeting and tape to create a partition between any other rooms.
- Cover windows with plastic sheeting to protect them from any flying debris.
- Remove doors, door trim and baseboards. Follow this baseboard removal guide if you’re hoping to reuse them in another project.
To get yourself ready:
- Find helpers. This project is easiest with at least two people.
- Wear long pants, sturdy shoes, goggles, a dust mask and work gloves.
The goal here is to protect your home and your body from dust particles, as well as broken studs and hammer swings.

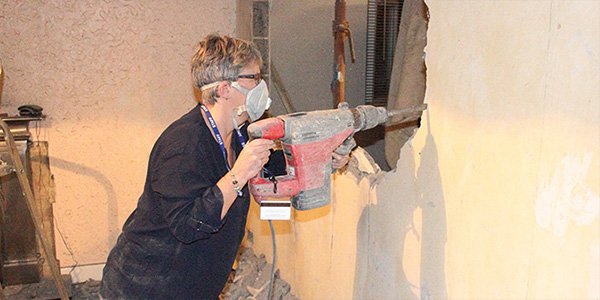
Step 2: Begin Knocking Down the Wall
Once you’ve prepared the room and taken steps to protect yourself, follow these steps to begin knocking down the wall:
- Use your utility knife to score the paint and caulk between the wall and the ceiling and the surrounding walls.
- Grab your sledgehammer and create a small starter hole between studs. Use a stud finder if you don’t know where the studs are located.
- Insert the reciprocating saw into the starter hole and cut out a large rectangle of drywall between studs. This will make your project neater and easier than breaking drywall into small pieces with the sledgehammer.
- Pull out and dispose of insulation if you encounter it. It’s unlikely that interior walls will contain insulation.
- Repeat this process until all drywall on the first side of the wall is removed.
- Staying where you are, use your saw to repeat the process on the drywall on the other side of the wall.
When you’re done removing pieces of drywall, take all the debris to the dumpster before moving on to the next step. You’ll need to make sure your work area is clean and free of hazards.
Step 3: Remove Wall Studs and Plates
With the drywall gone, you can clearly see the studs of the wall. To remove the studs, use the reciprocating saw to cut through the studs horizontally, about half way down the wall. Tug each new half toward you and then pull it out of the wall using a pry bar if necessary.
Next, you’ll remove the wall plates (the last stud on either end of the wall). Have a helper hold the stud while you run the saw between the stud and the wall, cutting through the nails. Once the nails are cut, pull the stud from the wall using a pry bar.
Do the same for the floor and ceiling plates. Once you’ve removed all studs and plates, use pliers to remove any nails or nail pieces that were left behind.

Step 4: Patch the Ceiling Where the Wall Was Removed
Now that the wall has been removed, there will be a hole in the ceiling where it used to be that will need to be covered.
To patch your ceiling:
- Insert the wood strips across the hole so they lay in the ceiling bridging the gap. Insert a strip every 16 inches down the entire length of the hole. Secure both ends of each strip to the existing ceiling by using the drill and screws.
- Cut a piece of drywall ¼ of an inch smaller than the hole and secure it to the strips using screws.
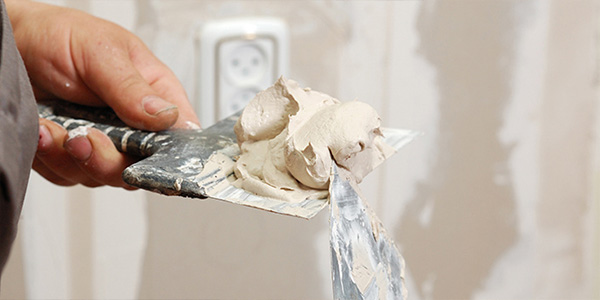
- Using a narrow-bladed trowel, spread drywall compound around the edges of the patched hole. Push drywall tape into the wet compound, then add another layer of compound and smooth it all out with the trowel.
- When the compound is dry, sand the patched area until it is level with the existing ceiling. If desired, you can repeat this process several more times, using a wider trowel each time you apply the compound, allowing it to dry and then re-sanding. Repeating the process a few times will create a more seamless integration with the existing ceiling.
Depending on the placement of the wall you removed, you may also need to use this process to patch the walls.
When satisfied with the patch, apply drywall sealer and primer, then paint the area to match the existing ceiling. Repaint the whole ceiling to guarantee a match.
Step 5: Patch the Flooring
Removing a wall will leave subfloor showing where your wall was previously located.
If your existing flooring is carpet or linoleum: If you have extra flooring around, simply cut a piece to fit the hole and secure it in whatever manner is appropriate for the material in question. You can also bring in a flooring professional to match and patch your existing flooring.
If your existing flooring is hardwood or tile: Hire a professional to install the new section and create a seamless transition between the new and old flooring.
If the rooms you’re merging have two different flooring types, consider installing new flooring to create a cohesive look in your new space.
Need Help Cleaning Up?
Before you knock down your wall, make sure you have a plan to get rid of your drywall debris. If you’re ready, get started by learning what size dumpster rental is right for you.

