How to Install Carpet in 6 Easy Steps
Project Overview
How to Lay Carpet Yourself
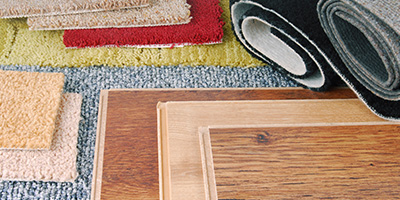
Nothing transforms a room quite like a brand-new floor. If you’re looking to add warmth and comfort to a living area, you can’t beat wall-to-wall carpet. According to HGTV, professional installation typically costs around $3 to $6 per square foot, or around $960 to $1,920 for an average-sized living room. Sometimes the cost of the carpet includes the underlay, but when it doesn’t, you’ll need to add about $100 to $200 to the total cost.
Wondering if you can lay carpet yourself and save some money on your new flooring? While installing carpet can be a challenging project, it’s easier than you might think to tackle yourself in the span of a weekend. With the right tools and these expert tips, DIY carpet installation is a simple process.
DIY Carpet Installation Guide
1. Measure Your Room and Gather Your Materials
Start by measuring the length and width of your room. Then, add between two and four inches to each number. Multiply these numbers to calculate the square footage of the room. If your space isn’t rectangular, divide the room into parts, and repeat this process for each. Try to keep each part of the room as close to a perfect rectangle as you can.
Once you have your total square footage, you should add anywhere between 10-20% to make sure you not only have enough carpet and underlay to cover the room, but also enough to account for mistakes in measuring or cutting. If you’re installing a pattered carpet, you should purchase an additional 5% of materials to account for matching the pattern between sections.
Once you have your room measured and your carpet selected, it’s time to get your tools for the job. Note that if your subfloor is concrete or wood, you will need a few additional items.
“If you know your exact measurements, you can try calling your local carpet supplier to see if they have any rolls or leftover sections they’re getting rid of for cheap.”
Stephan Sardone, Sardone Construction
Carpet Laying Tools
- Tack strips
- Stable gun (for wood subfloor installation only)
- Utility knife
- Stair tool
- Chalk line
- Tape measure
- Duct tape
- Seaming tape
- Knee pads
- Knee kicker
- Power stretcher
- Rolling pin or carpet roller
- Seaming iron
If you are installing on a concrete floor, these materials are also required:
- Cement-based waterproof filler
- Construction adhesive, like Liquid Nail
- Masonry nails
- Carpet adhesive
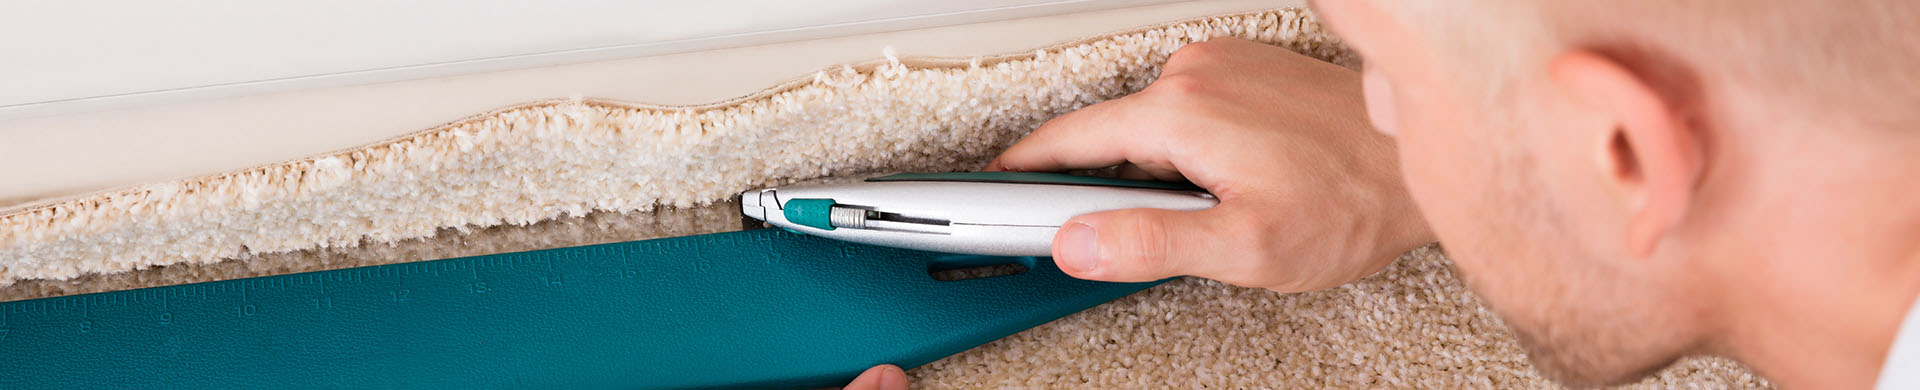
2. Prep the Room
Before you begin laying your carpet, the existing floor will have to be properly prepared. If you are replacing existing flooring, you’ll need to remove the old floor before starting. These guides will help you through the process:
Ripping out that groovy shag carpeting for something new?
You'll need our complete Carpet Removal Guide!
You may also consider removing your baseboards to ensure the new carpet is flush with your walls. Once you have the underfloor exposed, scrape or sand away any residue left from old adhesive.
Before you continue working, check for any issues with your subfloor, including sunken spots, squeaking and musty patches. Replacing a damaged subfloor and fixing loose floorboards will add time to your project, but the lasting benefit will be worth the effort.
If you are installing carpet over concrete, check for moisture or damage to the floor. Any cracks should be filled in with waterproof filler and leveled.
If the carpet will span between two rooms, you may consider taking doors off their hinges so you can comfortably access the floor as you work. Then, sweep and vacuum thoroughly so no debris is caught under your new carpet.
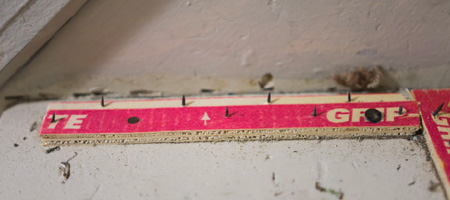
3. Install Tack Strip
Regardless of what flooring type you have, you’ll need to install carpet tack strips along every wall, with the exception of entryways and doorways. Make sure to leave about a half inch of space between the strip and the wall and that there are no spaces between each strip. It is important that the tacks angle toward the wall so it will grip the carpet properly.
What are Tack Strips?
Tack strips are the modern shortcut in carpet installation. As the name implies, these are strips of wood with tacks sticking up through them. These tacks are angled toward the wall, so when the carpet is pulled over it, the tacks catch and hold it in place. Traditionally, carpet was installed by nailing individual tacks through it into the subfloor, which required much more effort. This is why tack strips have the unlikely nickname of “tackless strips.”
The right way to install carpet tack strips varies from floor to floor. When installed on wood, you can simply nail the strip down. Installing tack strips on concrete is a bit different, though. Secure the strip to your floor with construction adhesive and nail it in place with masonry nails.
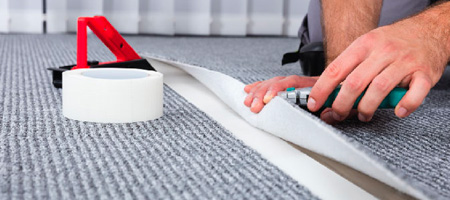
4. Install the Carpet Underlay
A padded underlay makes the floor more comfortable to walk on, and also keeps your carpet from rippling or bunching up. You’ll want to lay the underlay sections perpendicular to the direction you plan on laying your carpet.
If you are installing carpet over concrete, you should use a synthetic fiber underlay. The cold concrete floor risks causing condensation on the underside of the carpet. Synthetic underlays will prevent this condensation from soaking into the carpet.
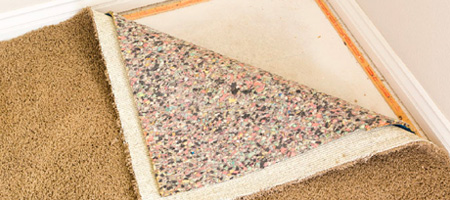
The underlay should butt up against the tack strips, but should not overlap them. Once the underlay is cut and laid where you want it, use a staple gun to secure it to the floor. When installing carpet underlay on concrete, lay out a few beads of carpet adhesive instead of using a staple gun. Then, seal the seams between pieces of underlay with duct tape.
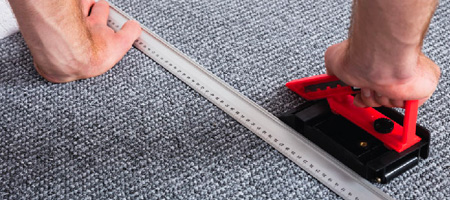
5. Cut and Lay the Carpet
Before laying the carpet in the room, cut each strip to size, but be sure to add an extra 6” to make sure you have plenty of room to trim it down. Cutting it too short will waste the entire strip.
Start with the carpet strip flush against one wall, and pull it across the room to the opposite wall. When you reach the far side of the room, snap a chalk line on the carpet where it meets the wall and cut away the excess with a utility knife. When you lay the next piece of carpet, you will need to make sure the pile direction of the new piece lines up with the pile direction of the first.
What is Pile Direction and Why Does It Matter?
The fibers of your carpet don’t sit straight up, but rather “face” in a specific direction based on how the carpet was made. Light reflects off the fibers differently because of the pile direction, which makes the color differ slightly when viewed from different angles. A simple way to determine pile direction is lay a small piece of paper on the carpet with a pencil laid on top. Using an open hand, roll the pencil back and forth over the paper. You will notice the paper moving with each roll. The direction that the paper moves is the pile direction.
Lay the next strip in the same fashion, overlapping the two strips by a few inches, and cut through both layers of carpet at the same time. This way, both pieces will fit perfectly regardless of any imperfections in your cut.
To seal the seams between two strips of carpet, line up your seaming tape under the carpet with the adhesive side up so that it spans the gap between sections. Use a steaming iron to activate the tape and secure the strips together. Be sure to run the iron over the tape, not the carpet. To complete the seam, press the pieces of carpet together with a carpet roller or rolling pin.
“Choose carpets that don’t have real specific patterns so that you have less waste when seaming sections together.”
Stephan Sardone, Sardone Construction
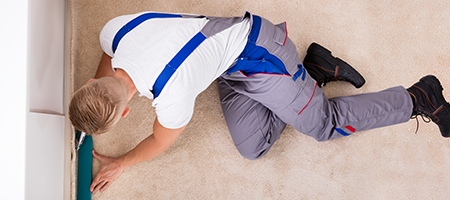
6. Stretch the Carpet
After it’s been laid, use your knee kicker to stretch the carpet. Starting in the center of any given wall, place the toothed end of the kicker facing the wall, about three inches away. Then, kick your knee into the tool to force the carpet into the wall. Be sure to wear knee pads so you don’t hurt yourself.
Since the tacks on the tack strip angle toward the wall, the carpet will automatically catch on the strip. After the initial kick, move down the wall, moving the knee kicker about one foot at a time. Continue around the room in the same manner until you’ve stretched the carpet across the whole room.
For larger spaces, you may consider using a power stretcher to ensure the carpet is stretched properly. To use the power stretcher, place the non-toothed end against one wall and the toothed end six inches from the opposite wall. Push on the activation lever to stretch the carpet more firmly over the tack strips.
If you left your baseboards in place, use a stair tool to tuck excess carpet underneath. Trim the carpet edges with a utility knife if there is any excess. Cut the carpet around any doorways, ensuring that the edge will be centered under the closed door, and install a door edge strip before reinstalling the door. Finally, cut openings for floor vents before putting them back in place.
Clear Away the Mess After Your New Carpet Installation
With your new carpet installed, all that’s left to do is clean up, get your furniture back in place and enjoy. Left with a lot of project debris? Consider renting a residential dumpster to easily toss out the old flooring and carpet scraps.
Is carpet installation part of a larger remodel?
Learn more with our handy guide!
Read More Like This
Not fully sold on having carpet in every room? Or maybe just feeling inspired to take on more projects around the house? Follow our guides to keep the DIY momentum going.