How to Remove a Tile Floor: A Step-By-Step Guide

How to Remove Tile Flooring
Wondering how to remove an old tile floor? There are plenty of reasons why you may need to get rid of that old flooring. Perhaps it cracked when you were moving your refrigerator. Or maybe it’s a bit too slick when you’re getting out of the shower. Or possibly you just want a change.
So, what’s the best way to go about removing a tile floor? We’ll show you how it’s done in five easy steps — but first, here are a few things to keep in mind before you get started.
4 Things to Consider Before You Start Your Tile Removal
1. What is the Cost to Remove a Tile Floor?
The cost to remove a tile floor depends on a number of factors including the size of the room and whether you’re looking at DIY tile removal or planning to hire a contractor:
- The average cost for removing old tile is $2.50 to $5.50 per square foot when you hire a contractor.
- If you choose the DIY route, the cost is as little as $1 per square foot.
- In terms of the size of your floor, a 50-square-foot room ranges between $130 and $280 for tile removal.
- And a 225-square-foot room costs between $570 and $1,240 for tile removal.
2. What Tools Do I Need for Removing Tile Floor?
There are plenty out there that you can use, whether they are power or hand tools, and each job will require a different assortment. Here’s a quick list of tools that are almost always needed for tile removal:
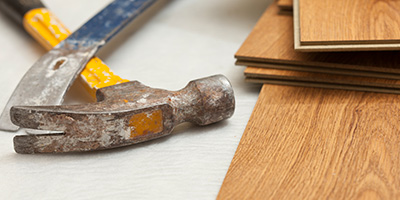
- Hammer
- Pry bar
- Long-handled floor scraper
- Chisel or air hammer with a chisel set
- Scraper
- Screwdriver
- Tarps and plastic wrap
- Painters’ tape
- Shop-Vac
- Shovel and buckets
Pro Tip: Don’t Forget to Protect Yourself
Just as important as having the proper tools for the job is having the proper gear to keep yourself safe. Tile can be extremely sharp when broken, so long-sleeved shirts and pants are suggested. Gloves and safety goggles should be worn at all times, even through the cleanup phase. Finally, a safety mask is also a must. The tiles will create a lot of dust that you don’t want to be breathing in.
3. Is Your Tile Attached to an Underlayment or Set in Mortar?
An underlayment is the material used under the tile and tile adhesive to stabilize and level out your installation. Plywood or cement board are most commonly used. With an underlayment, there is a thinner adhesive, making your job easier. If your tile is attached to an underlayment, you can follow our steps below for DIY tile removal.
If your tile is set in a mortar bed, or thick-set installation, removal will be more difficult. Mortar bed is made of sand, cement and water to create a thick, spreadable adhesive. Usually, the mortar bed is reinforced with wire for added strength and to prevent cracking. We recommend using machinery rather than a chisel and hammer to remove the mortar.
4. Should I Remove Asbestos Tile Myself?
No, you should leave asbestos tile removal to the professionals. Removing tile flooring is a relatively safe project, unless you’re dealing with asbestos floor tiles or adhesives.
Daniel King, from The Mesothelioma Center at Asbestos.com, says that while these types of tiles are not dangerous while intact, the danger lies when they are removed.
“Asbestos is dangerous when it gets into the air as dust,” King says. “In many cases, the best thing to do it put a new layer of flooring on top of it or seal it with a coat of epoxy floor paint. Both these options will keep asbestos fibers trapped.”
King also notes that while vinyl flooring tends to be the most at-risk of containing asbestos, it is possible that the glue holding the tiles in place may contain asbestos.

“It is safest to assume any vinyl flooring material put down before 1980 contains asbestos. You can’t tell whether a product has asbestos just by looking at it — unless it happens to have a manufacturer’s label on it that says ‘contains asbestos’ or ‘asbestos-free.'”
Daniel King | The Mesothelioma Center at Asbestos.com
King suggests having an asbestos abatement professional inspect any floors you are unsure of. He also says that a sample of the material could be sent to a lab for testing, but that you need to exercise caution while getting the sample to avoid breathing in any dust.
“I always recommend leaving asbestos removal to professionals,” King says.
Removing a Tile Floor in Five Steps
1. Prepare the Area
Before you dive right in and start pulling up tiles, you need to get your rooms ready for work. This is a fairly quick process that will help set you up for success while ensuring you don’t ruin your possessions.
- Remove free-standing items: Whether it’s an umbrella holder or a coffee table, it needs to get out of the room. After all, you’ll be removing the old tile that it’s sitting on. And, while you’re clearing the room, it might not be a bad time to consider throwing some stuff out to declutter your home.
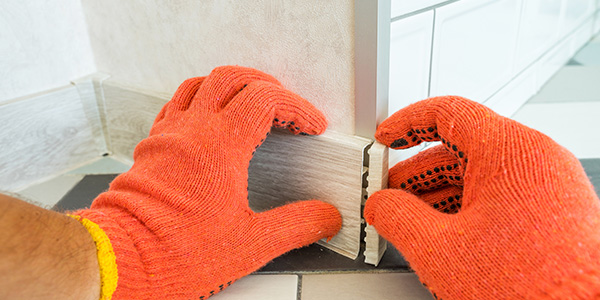
- Take off any baseboard trim: Using a screwdriver or hammer/pry bar combo, remove any baseboards that might be on your walls. Be sure to do this carefully, as you’ll probably want to reinstall them once your tile removal job is done.
- Seal the vents: As noted before, removing tile floors is a dusty job. You don’t want to clog your air system with pieces of tile and debris. Use plastic wrap and painters’ tape to seal off your vents.
- Cover what you can’t move: If there are items you can’t move, but don’t want to get covered in debris — such as a kitchen island or built-in shelving — use a tarp to cover those items.
Additionally, Robert Robillard of A Concord Carpenter, LLC, says that having space is key when it comes to removing old tiles. In other words, anything that can be removed should be, even if it requires a bit more effort because it will save you time in the long run.
“Trying to work in a bathroom without removing the vanity or something like that is always difficult,” Robillard says. “It’s easiest when the entire room can be cleaned out and give you more room.”
Need to throw away large items, and not sure what your options are? Check out our disposal guide!
2. Create a Starting Point
The best places to start your tile removal are:
- An area where there isn’t tile, like where your toilet usually is
- A spot with already loose or cracked tile
- The doorway, where the tile floor meets the next room

“You want to look for an edge. Sometimes that is where you got rid of a vanity. Sometimes it’s a threshold… pop the threshold off and you have a clean edge. Basically, the best place is if you can find an area where there is a clean edge. You want to look for an area where you can peel it up.”
Robert Robillard | A Concord Carpenter
How to Pull Up Tile
Once you’ve found your starting place, follow these steps to start removing your tile floor:
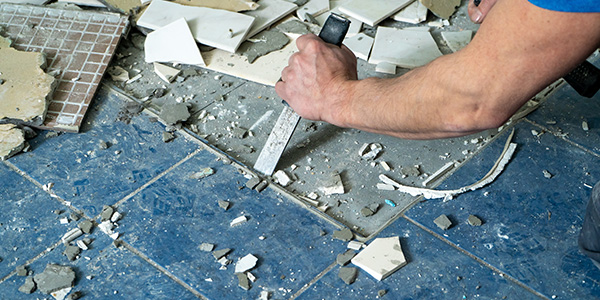
- Break apart the first few tiles using your chisel and hammer.
- Remove the broken pieces and place them in a bucket. You don’t need to worry about getting every piece, but getting the bigger chunks out of the way will help in the long run.
- Inspect the underlayment of the floor to make sure there is no damage.
- Use a pry bar to pull up tile that isn’t easily removed.
3. Continue Removing Old Tile
This is where the real work begins. When to start it, though, will vary from person to person. Once you have removed enough tile to comfortably use either your long-handled floor scraper or air hammer with a chisel set, it’s time to get the bulk of the work done.
Use your tools to get underneath a tile and pry it away from the underlayment. Don’t worry if the old tiles break — some will come up easier than others, but all of it will be getting tossed.
As you’re working remember:
- Don’t use too much force, as it could result in damage to the floor or even personal injury.
- Use a shovel to scoop up bigger chunks of tile and dump them in a bucket.
- As you get closer to removing tiles that are near a wall or cabinets, consider switching back to a chisel and hammer to avoid damage to those surfaces.
- Remember, this part of the process will take a decent amount of time. Don’t be discouraged if it’s taking longer than you would like.

Pro Tip: How to Remove Tile From Concrete Floor
How you remove tile from a concrete floor depends on the type of adhesive used. If a thin-set adhesive is used, follow the general instructions in our guide. But if your tile is secured to the concrete with mortar, you’ll want to abandon the chisel, pry bar and hammer for a hammer drill with a chisel attachment. Angle the hammer drill at your starting point and switch it on. Move from one tile to another as the hammer drill breaks them up. When you finish, it’ll be easier to scrape away the remaining mortar on the floor.
How to Remove Tile Floor From Wood Subfloor
Follow our instructions for removing the tile and adhesive. After you finish removing the tile and adhesive as much as you can, be sure to level out the subfloor. Grind down any high spots and use a leveling compound to fill in low spots. If you don’t level out your subfloor, any flooring you put on top of it will be uneven.

Pro Tip: How to Remove Tile Floor Without Damaging Subfloor
Work slowly and in small sections. Rather than prying tiles from the floor, use a chisel and hammer to break them to avoid damaging the subfloor.
4. Inspect and Remove the Underlayment
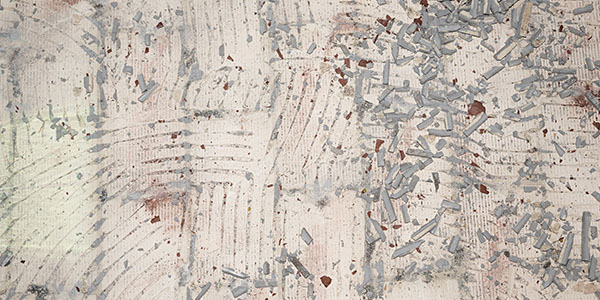
Now that the tiles are all removed, it’s time to take a look at what’s underneath. Typically, you’ll find a layer of underlayment – material that sits between your subfloor and your finished flooring. But if you’re working in your basement or an older home, you may find that the tile was installed directly to a concrete or wood floor.
If you find a plywood underlayment and you plan on installing new tile, Robillard suggests replacing it with a more stable and sturdy material. “Plywood really isn’t the best underlayment for tile,” Robillard says. “[Q]uarter-inch and half-inch cement board and underlayment board is going to be a much better underlayment than a plywood board.”
The main reason that plywood is no longer considered the best underlayment for tiles is because it is absorbent and will expand with moisture, which can cause a rigid material like tile to crack. However, for flooring types like vinyl or linoleum, plywood is still a fine underlayment.
If the plywood underlayment and subfloor panels are in good shape, you can reuse it if you’re installing other flooring materials. When reusing existing underlayment or removing tile from a wood or concrete floor, it’s important to know how to remove floor tile adhesive properly.
How to Remove Floor Tile Adhesive
- Cover the patches of adhesive with a citrus-based adhesive remover. They can be found at most home improvement stores.
- After waiting the recommended amount of time for the adhesive remover product, use your scraper to work up the loosened material. If your tile was placed with tile mortar or thinset — both of which will look like cement — you may need to use a chisel and hammer to chip away the larger pieces.
- Throw patches of removed adhesive into a bucket.
- Continue until all floor tile adhesive has been removed.

Pro Tip
Be sure to keep the area well ventilated by opening windows or using a fan.
Removing the Underlayment
- Remove any screws that you can see.
- Use your pry bar to work the underlayment up. Don’t worry if it breaks, as you won’t be reusing it.
- Continue prying until the underlayment has been completely removed.

Important Safety Tip
There will be a lot of nails in the underlayment, so be careful as you pick up the pieces to throw out.
If you decide to remove the underlayment, you’ll need to replace it before you install a new floor. Each type of flooring will have unique underlayment needs. As a result, the cost, skill level and time commitment will vary based on the floor type you pick. “We always suggest replacing the underlayment,” says Robillard. “You’re redoing the floor, so you might as well make sure the support is good, too.”
Want to save money on hardwood floors? Check out how to install them yourself!
5. Time to Clean Up
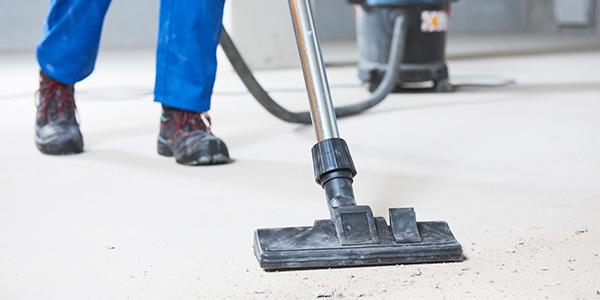
With either your underlayment or subfloor exposed, it’s time to clean up the mess.
Take your buckets filled with old tile, adhesive and underlayment chunks and throw them out. For larger tile removal projects, consider renting a dumpster for easy debris removal, rather than waiting for your next bulk trash pickup day.
Use your shop-vac to vacuum up smaller pieces of debris as well as dust. You won’t want to rush this step, as it is one of the most important when it comes to installing your new floor. Any dust that has not been cleaned from underlayment or subfloor will make it harder for a new floor to properly adhere to the surface.
Check Out Dumpsters Near You

