What to Do When a Pipe Bursts in Your Home
What to Do When a Pipe Bursts
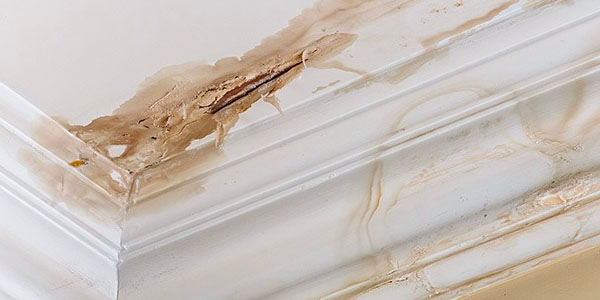
Coming home to burst pipes and a water leak – the thought alone is enough to fill any homeowner with dread. But, it’s an unfortunate reality for many. If a pipe bursts in your home, do you know what to do? We’ve consulted industry experts in plumbing, restoration and insurance claims to share these essential, time-sensitive first steps.
Follow along to learn how to recognize the signs of a busted water pipe, the first things you need to do when a pipe bursts in your home and how to prevent your pipes from freezing in the first place.
Signs of a Busted Water Pipe
Sometimes, a busted water pipe can show warning signs before serious damage occurs. Watch out for common symptoms of a pipe burst, which include:
- Fluctuating water pressure.
- Discolored, rusty water with a strange smell.
- Pipes making clanging noises behind walls.
- Your water bill suddenly spiking.
- Puddles forming under your sinks.
If you notice signs of a burst pipe, you must take action quickly to limit the damage that is done.
First Steps to Take When a Pipe Bursts
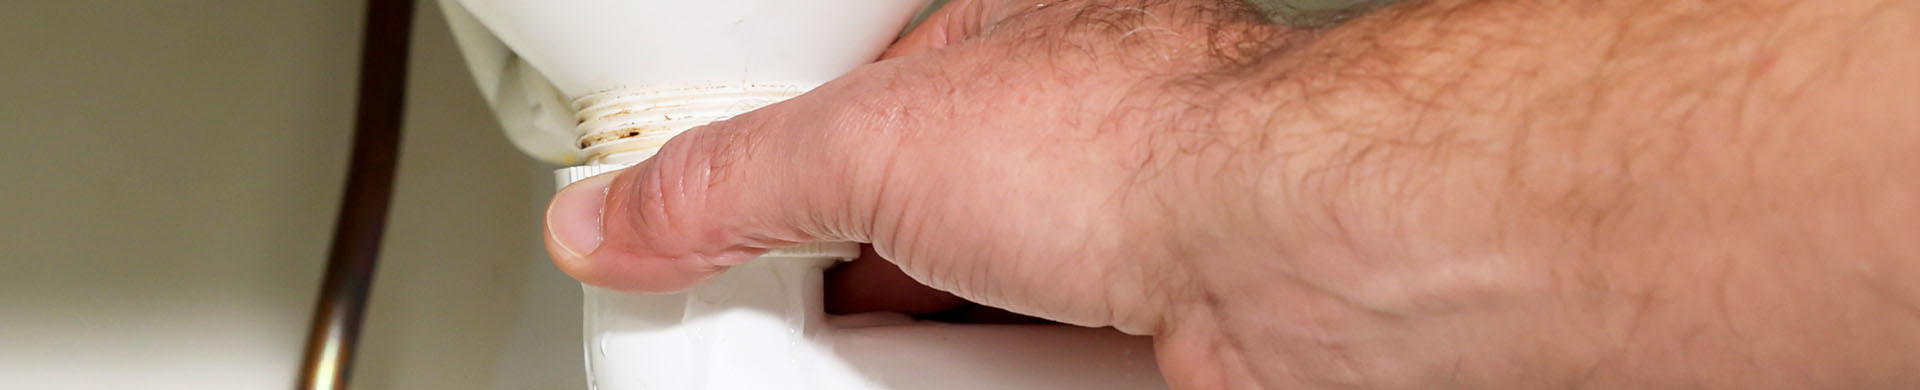
1. Turn Off Your Water and Drain the Faucets
The first thing you need to do when you find a burst pipe is shut off your water. The sooner you can do this, the better your chances are of minimizing water damage. Your main water shut-off valve is likely located near your water heater, in a crawl space or in your basement.
Once the water has been shut off, you should open your faucets to drain the remaining cold water in your pipes. This will relieve pressure in your pipe system and can help prevent additional areas from freezing. Then, flush all the toilets in the house. Once water is no longer running from the taps, any leaks should stop.
Depending on the location and size of the leak, you may also need to shut off your electricity. If you suspect the leaking water came into contact with any electrical sockets or your fuse box, this is an important precaution to take.
“Turn off your home’s main water supply valve immediately. This will limit the amount of water damage your home suffers. Every second counts! Every person who lives in your home needs to know where the main water shutoff valve is located and how to turn it off and on, so they understand how to do so in the event of an emergency.”
Paul Abrams | Public Relations Director, Roto-Rooter Services Co.
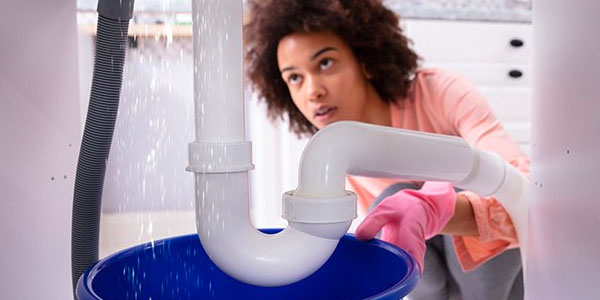
2. Locate the Burst Pipe
Your next step should be to figure out where the pipe burst. If it appears to have been leaking for a while, be careful entering rooms and look for bulging ceilings and other warning signs that water damage has already occurred. If you catch the leak early enough, place a bucket underneath to catch dripping water.
“Looking exactly where the pipe burst is should be done immediately to prevent further damage. If it’s a tiny crack, patching it up may fix the problem for a while. Also, consider which pipe has burst. If the damage is in a main water pipe, it needs to be repaired and dealt with carefully, regardless of the cause or size of the break.”
Leo Nov | Owner, RestorationSOS
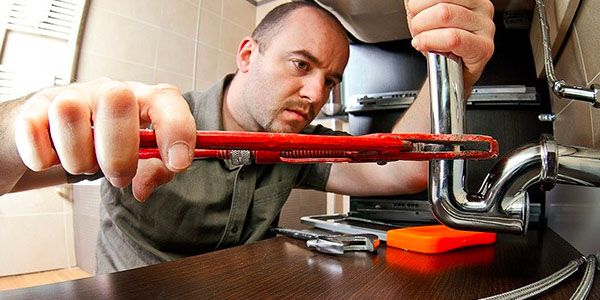
3. Call In Professional Help
As soon as possible, call in the experts to handle repairs. Hire a professional plumber to fix or replace your burst pipes, and if you have any damage to your electrical system, you should bring in a reliable electrician.
According to HomeAdvisor, the average homeowner spends between $1,000 and $4,000 on burst pipe repair and cleanup, though costs can vary based on location, the extent of the damage and if emergency after-hours service is needed.
“There’s just no substitute for an experienced professional. A licensed plumber will make reliable repairs, whereas an inexperienced homeowner or handyman may complete a repair that is inadequate and could soon fail. Besides, a professional plumber has liability insurance and if his repair fails, he is responsible for making it right. If you or an uninsured handyman make the repairs, you’re on your own if something goes wrong.”
Paul Abrams | Public Relations Director, Roto-Rooter Services Co.
4. If There's Damage, Document It for an Insurance Claim
If the damage from your burst pipe seems extensive, you should begin taking photos of affected areas immediately, and continue to do so every step of the way. The experts at ClaimsMate Public Adjusters advise, “Take a close-up photo of everything that’s damaged, along with water lines and water-damaged items. Place a measuring tape to show how high the water is, then back up to take photos at different angles, showing the areas in your home where damage has occurred.” They also recommend turning the water back on momentarily, so you can take a video of the leak.
Once water damage occurs, you typically have a three-day window until microbes spread and mold begins to grow, so it’s important to file a claim as soon as you notice the leak. If you have trouble understanding what’s covered in your homeowners’ insurance policy, you can reach out to a public adjuster in your area. They’ll usually review your policy for free, so you can know what to expect before opening your insurance claim.
“It’s impossible to take too many photographs of the water leak and damage. On average, we have over 1,000 pictures from each client. Documenting damage for your insurance company is like photographing a crime scene, and the more photos you have, the easier it’ll be to prove your position.”
Stephanie Corona | Founder, ClaimsMate
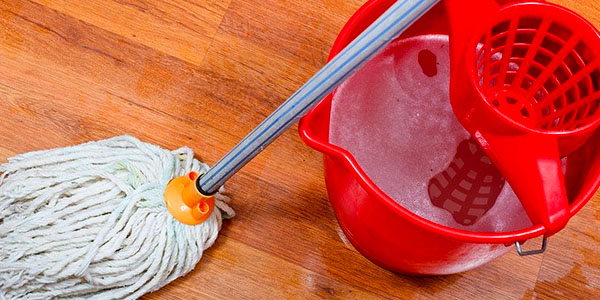
5. Start Cleaning Up
If your house is flooded from a burst pipe, it’s important to dry the wet areas as quickly as possible. The longer water sits, the better chance there is for mold to grow and for more extensive, long-term damage to be done.
Simplify your cleanup by renting a dumpster.
How to Clean Up After a Water Leak
Salvage Important Belongings
In the case of standing water in any room, you should quickly unplug any electronics before you start recovering important belongings. When salvaging items that have come in contact with water, prioritize things that are the most difficult to replace or the most expensive, such as important documents, family keepsakes, computers and TVs.
Expert Cleanup Tips:
- Wipe all of your personal items down with a plant-based antimicrobial, move them to a dry location and put fans on them, until the insurance company can get there to assess if items need to be professionally cleaned or thrown away.
- Other than damaged drywall and flooring, keep everything around until the insurance company comes, so they can confirm the quality and grade of your items to file your claim.
- If you’ve been gone with a water leak for more than 72 hours, mold has had a chance to spread, and it’s all considered graywater – meaning everything must go.
Stephanie Corona | Founder, ClaimsMate
Dry Any Wet Areas
Remove everything you can from the affected areas, including soaked carpets and furniture.
If you’ve shut off your power or standing water is shallow, you can use old towels, mops and buckets to dry affected areas. If your house is flooded a few inches or more from the burst pipe, you’ll want to use a submersible pump or a wet/dry vac. These can be rented or bought from your local hardware store or Home Depot.
After standing water has been cleaned up, open windows (weather permitting) and set up fans and space heaters to speed up the drying process. ClaimsMate’s Stephanie Corona warns not to turn on your A/C system to dry out a flood, as microbials can get up into your ductwork this way and lead to further damage.
In the case of burst pipes flooding your basement, additional cleanup measures are likely in order. Learn how to fix and clean up a flooded basement here.
“In some cases, excess water can be removed through use of a wet-dry vac unit, but in cases of considerable depth, such as several feet of water, more heavy-duty equipment, such as gas-powered submersible pumps, will be required. All of the water will need to be pumped out of the structure and then fans, blowers, and dehumidifiers will need to be brought in to remove residual moisture from the property.”
Leo Nov | Owner, RestorationSOS
Toss Ruined Items
Once the emergency cleanup and repairs are done and you have all your insurance documentation taken care of, it’s time to get rid of anything that’s been ruined or is at risk of growing mold. Important items to dispose of include:
- Carpeting, rugs and drywall that have been submerged.
- Cloth items or upholstered furniture that isn't washed and dried within 48 hours.
- Electronics that have been submerged and damaged.
If you’re questioning the safety of any item, ask an expert to make sure none of the items you’re saving are at risk of growing mold or bacteria. And if you have a lot to get rid of once you start cleaning up, consider renting a dumpster to dispose of your waste.
Disinfect and Take Action to Prevent Mold Growth
Absolutely everything that’s come into contact with the water leak needs to be properly dried out, cleaned and disinfected. Depending on the severity of water damage in your home, you may consider bringing in mold-prevention and restoration specialists at this point in your cleanup. These professionals have proper tools to detect moisture behind walls and under flooring, to ensure the home is free from mold and residual water damage.
“Carpets will need to be taken up, dried out, cleaned, and disinfected; often more than once. All flooring, walls, and ceilings will need to be similarly treated in order to avoid staining, swelling, cracking or warping, and to prevent mold. Furniture and other loose items will need to be removed, dried out and cleaned elsewhere.”
Leo Nov | Owner, RestorationSOS
How to Prevent Pipes From Freezing
Common Causes for Busted Water Pipes
- Freezing, likely from exposure to severe cold and lack of insulation
- Water hammer - or the movement of unsecured pipes - weakening pipe joints
- Issues with high or fluctuating water pressure
- Weakened pipe walls due to rust and hard water corrosion
“Freezing is the most common cause we see for busted water pipes and leaks. In addition, a lot of burst pipes are caused by wear-and-tear or manufacturer’s defects. These causes are typically excluded from insurance policies, though the resulting damage could still be covered.”
Stephanie Corona | Founder, ClaimsMate
Prevention Tips
It goes without saying that any homeowner would want to prevent the stressful (and often expensive) experience of having a burst pipe flood the house. So, how can you prevent your pipes from freezing and bursting in the future?
The most effective prevention tips include:
- Draining outdoor hoses when the weather starts to get cold.
- Adding insulation to unheated areas with pipes, such as the garage, an unfinished basement or the attic.
- Insulating pipes themselves, using foam tubing. (Pro Tip: Home improvement stores sell self-sealing insulation for easy DIY attachment.)
- Keeping a consistent temperature set on your thermostat, and never letting your home’s temperature dip lower than 55 degrees Fahrenheit.
- Letting cold water drip from your faucets when temperatures are below freezing.
If you suspect a frozen pipe, try thawing it using a hair dryer or space heater before the pipe bursts.
“If the pipe burst because it froze, take steps to insulate water supply pipes and outside walls that have pipes inside them. If the pipe simply failed and did not freeze, ask the plumber why he thinks it happened and get his advice for avoiding future problems. Depending on the age of your home, your water supply pipes could be made of cast iron, lead, copper, PVC, or PEX (cross-linked polyethylene) tubing. Each material has its strengths and weaknesses, and an experienced plumber can provide good advice and guidance for avoiding future failures.”
Paul Abrams | Public Relations Director, Roto-Rooter Services Co.
Plan Ahead to Protect the Rest of Your Home
After handling the burst pipe repair and water leak cleanup to restore your home, you may feel inspired to take additional measures that will protect the house from future damage.
Tackle other preventative projects with these helpful guides: