The Home Deconstruction Guide: How to Salvage Building Materials

How to Deconstruct Your Home
When you tear down your home to build anew, where does all the debris go? Typically, straight to the landfill.
A 2018 EPA study shows that the United States generated 600 million tons of construction and demolition (C&D) debris in just one year. That’s more than twice the amount of municipal solid waste created at that same time. What if there were a more environmentally friendly way to dispose of your debris?
Residential deconstruction helps reduce C&D debris by saving usable materials. By following these steps below, you can salvage doors, windows, roofing materials, appliances and much more. Then, reuse these recycled building materials in your newly remodeled home or donate them for others to use in their DIY projects. You'll help save the environment and build a truly unique home.
What Is Deconstruction?
House deconstruction, or green demolition, is the process of carefully taking apart your home. The goal is always to salvage building materials and send as little debris to the landfill as possible. When dismantling an old house, you can typically reuse or donate up to 90% of the salvaged materials.
Deconstruction Vs. Demolition
The biggest difference between home deconstruction and traditional demolition has to do with how building materials are handled. In deconstruction, the goal is to save materials wherever possible. In traditional demolition, the goal is to tear down a building as quickly as possible.
With demolition, you aren't spending the extra time and labor to save materials. This makes it a quicker and less expensive option upfront. However, it's not great for the environment and little to none of the leftover materials are reusable.
Depending on the size of the house, traditional demolition can take about 2-5 days, while deconstruction can take up to two weeks. But even though it can take longer, the deconstruction process can save you money when you reuse items in your next project.
“The main difference between deconstruction and demolition is how building materials are regarded. Demolition regards unwanted material as junk or trash. Deconstruction recognizes the inherent value in this material.”
Samantha Hale | The RE Store
How Much Does It Cost to Tear Down a House?
Deconstruction costs are typically twice as much as the cost of demolition. The average cost to tear down a 2,000-square-foot home is:
- Demolition: $18,000
- Deconstruction: $35,000
With that said, it's important to consider the tax benefits that come with residential deconstruction. If the value of your donated materials is around $170,000, then you could get $68,000 back in your pocket. You would then make a profit off of your deconstruction. Your new cost comparison on a 2,000-square-foot home becomes:
- Demolition: -$18,000 + 0 = -$18,000
- Deconstruction: -$35,000 + $68,000 = +$33,000
At the end of the day, deconstruction can put money back in your pocket.
Benefits of Residential Deconstruction
Deconstructing a house for building materials helps the environment and your community. Some of the biggest benefits of house deconstruction include:
- Lets families and communities purchase more affordable recycled materials.
- Keeps those materials local.
- Lowers use of landfills and incinerators, easing the costs on local governments and taxpayers.
- Reduces harmful gas emissions from landfills and incinerators.
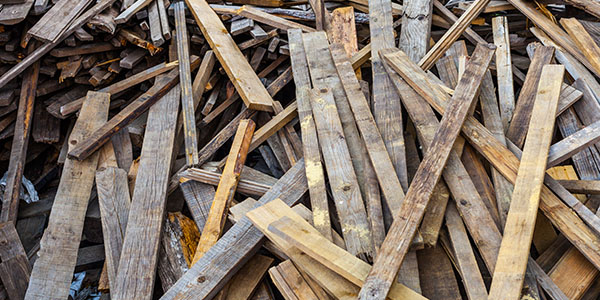
- Helps save trees — a typical 2,000-square-foot house produces up to 6,000 feet of reusable lumber when deconstructed.
- Reduces dumping and demolition expenses.
- Creates a potential tax break — in some areas, homeowners can claim many recovered materials donated to a qualified 501(c)3 nonprofit.
- Creates jobs in the recycling industry.
Can I Deconstruct My Home?
In some instances, a home may not be the perfect candidate for home deconstruction.
"In general, pre-WWII buildings are better for deconstruction than those built afterward, for a variety of reasons. First is the quality of the building materials. Back then buildings were built to last, and much of the woodwork was decorative and also made from virgin timber. That makes the materials more valuable. Another advantage of older buildings is the way they were built. Older buildings were nailed together and it can be easier to take them apart. More modern construction methods include using adhesives and other materials, such as blown in insulation, that render anything they touch as unrecoverable, not even able to be recycled."
Bill Turley and Becky Caldwell | Construction & Demolition Recycling Association
Good Deconstruction Candidate | Poor Deconstruction Candidate |
|---|---|
The building is wood-framed. | There was a major fire. |
The home contains materials with high resale value. | There is substantial water damage. |
There is brick-laid construction with mortar. | The building is not structurally sound. |
The building is structurally sound. | There are rotted or decayed materials. |
Even if your home isn’t the perfect candidate for residential deconstruction, there are usually still some materials, such as glass and metal, that can be saved.
"There is almost no circumstance in which a home does not have something to offer for deconstruction. At the low end of desirability, it would be at least a day’s worth of work and increasing from there, depending on the size and aggregate value of the home’s materials."
Pete Theodore | Second Chance
Before You Dismantle Your Old House
Before you try to demolish a house yourself, there are a few things you need to do to ensure your project goes smoothly.
Contact a Deconstruction Contractor
While you can DIY some of the deconstruction processes, you’ll need a contractor to help with certain things. Some steps require heavy machinery and previous experience tearing down a home. You’ll want to work with a trained deconstruction contractor to identify, remove and save reusable materials.
There are plenty of local and national organizations that hire deconstruction contractors. Habitat for Humanity offers local deconstruction services. Their volunteers will remove many interior items and give you a donation receipt. Then, your recycled building materials will be resold at their ReStore. All the proceeds go toward their home-building efforts in your city.
Get a Deconstruction Donation Appraisal
If you plan to donate your recycled materials to a nonprofit and the total value of your items is $5,000 or more, you’ll need a qualified appraisal. Get an IRS-approved inspector to inspect your home and appraise the materials you want to donate. Some organizations with IRS-approved appraisers include:
- International Society of Appraisers
- Appraiser’s Association of America
- American Society of Appraisers
After the inspection, you’ll receive a qualified appraisal signed and dated by the appraiser. You’ll also need to file Form 8283, signed by you and the appraiser, to your tax return to make sure you get your deduction. Check out the IRS guidelines for more information on qualified appraisals.
“As a personal property appraisal firm we provide complimentary inspections and estimates of the fair market value of the materials to be donated. This allows clients to have a complete understanding of the potential benefit and all of the associated costs prior to engaging us. We are in communication with the nonprofit organization to have a complete understanding of the materials that cross the threshold for the donation. Once we have a signed donation receipt we begin our research to provide an IRS-qualified appraisal report that line item values every material that has been donated from the project.”
Elizabeth Holmes, ISA AM | Green Donation Consultants
Get Necessary Permits
Before you start your project, you’ll need a deconstruction or demolition permit from your local municipality. Some cities have a deconstruction permit that outlines how much of the building needs to be salvaged.
If your home has asbestos, you’ll need an additional permit. Be sure to contact your local municipality to ensure you have all the necessary permits before you start deconstructing.
Contact Utility Companies
Shut off all utilities before tearing down your home. This helps you avoid any accidents on-site during the deconstruction process. Also, your neighbors may lose access to their utilities if you don’t properly disconnect yours.
Decide Which Materials Can Be Saved
Your qualified appraisal will have an itemized list of salvageable building materials. Communicate which items to save with your contractor and nonprofit volunteers, if you choose to work with a charitable organization. Materials you can save include:
- Flooring
- Cabinets
- Concrete and asphalt
- Wood
- Furniture
- Appliances
- Roofing materials
- Windows
- Doors
- Toilets
- Sinks
- Electrical and plumbing
- Brick
“The percentage of a home that can be salvaged depends on the house and what materials were used in its construction and their condition. A major reason for the disparity about how much of a house can be deconstructed is whether the foundation is recycled along with the rest of the structure. On some jobs, that element is left to a demolition company.”
Pete Theodore | Second Chance
Talk to Your Neighbors
Let your neighbors know about your project ahead of time. The noise and debris from your house deconstruction could be a disturbance. It's important to talk to your neighbors so they can prepare for the job.

How to Deconstruct a House for Building Materials
Now it’s time to learn how to demolish your house yourself — with help from your contractor. While you may be able to do the first five steps yourself, we highly recommend letting your contractor take the lead for steps six and seven.
This process could take anywhere from a day to a week, or even longer. It all depends on the size of your home and the number of materials you’re saving.
1. Prepare Your Area
Before you begin, set up temporary fencing around your property. This will keep the mess contained and help prevent debris from flying into your neighbor’s property. Hang warning signs on the fence to prevent anyone from accidentally entering your work area.
You also want to remove all furniture from your home. Be sure to keep track of which pieces you plan to donate, reuse or toss.
2. Gather Your Tools
Aside from your protective safety gear, including respirators, you’ll need several hand tools and heavy machinery to complete your project. Unless you have the proper training, we recommend letting your contractor use the heavy machinery.
Interior Deconstruction Tools | Exterior Deconstruction Equipment |
|---|---|
Sledgehammer | Excavator |
Crowbar | Material handler |
Pliers | Crane |
Nail-puller | Bulldozer |
Wire cutters | Backhoe |
Rotary hammer | |
Drill | |
Snips | |
Hammer | |
Demo fork | |
Screwdriver | |
Pry bar | |
Reciprocating saw |
In addition to these tools and equipment, make sure to have plenty of water available for your contractors, volunteers or friends who are helping you with the job. Consider renting a porta-potty so you have a convenient restroom on-site.
Safety Tip: Have a first-aid kit on-site in case there are any injuries.
3. Rent a Dumpster
Having a dumpster rental on-site makes for easy debris removal. While you’re salvaging most of your materials, you’ll still have some debris that needs to go to the landfill. If you’re unsure which size dumpster to rent, use our weight calculators to estimate your tonnage of debris ahead of time.
Safety Tip: Clean as you work to keep your workspace clear and safe.
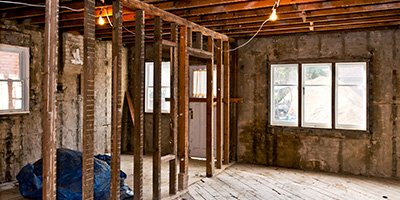
4. Start From the Inside
Remove glass materials first. Then, you can start taking apart the rest of the interior, such as doors, lighting, window frames, toilets, sinks, pipes, carpeting and other flooring materials.
Safety Tip: Remove nails from lumber and other materials as soon as possible to avoid any injuries.
5. Remove Drywall and Plywood
Your next step is to take down the drywall and plywood. Make sure to locate load-bearing walls ahead of time to avoid any structural damage before you’re ready to tear down the exterior.
Rent a dumpster to easily get rid of your old building materials.
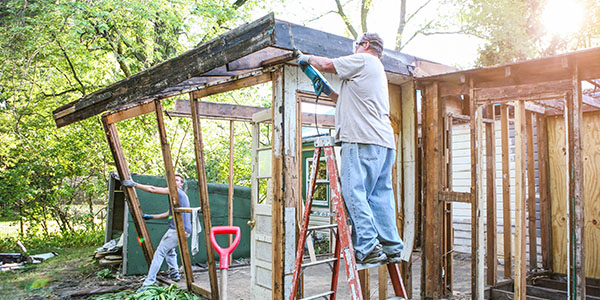
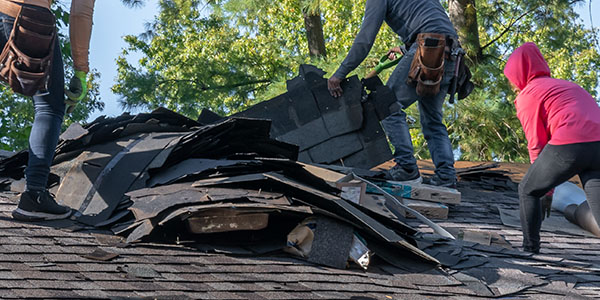
6. Move to the Roof
After deconstructing the interior of your home, it’s time to start on the exterior. You want to begin at the top and work your way down. Remove roofing shingles, insulation and underlayment.
Safety Tip: Make sure those working on the roof have proper harnessing and fall protection gear. Keep ladders in proper, stable spots. Provide guardrails if possible.
7. Tear Down the House
Start by caving the roof in on itself with an excavator. You want to push all walls inwards, so they don’t fall towards you.
Then, move any debris to your dumpster and get started on the foundation. Break up any concrete and dispose of any bricks or asphalt that you don’t plan to reuse.
Where Can I Donate My Recycled Building Materials?
Congrats on your house deconstruction! Many organizations take demolition recycling. You can donate your materials to 501(c)3 charities, Habitat for Humanity and local salvage stores, or leave them outside your home for your neighbors to take. And of course, you can always reuse your materials for other projects.
Some nonprofits that accept salvaged building materials include:
Looking to Reuse Your Salvaged Building Materials in a Sustainable Renovation or Remodel?
Understanding residential deconstruction is a great first step to a sustainable remodel. For help making your big project a little greener, check out the guides below.